Starting your woodworking journey doesn’t require a professional workshop or expensive equipment. Simple wood projects at home offer the perfect way to develop new skills while creating functional items for your space. Whether you have a small apartment or a garage workspace, you can tackle beginner-friendly projects that deliver impressive results.
This Website contains affiliate links. That means I may earn a small commission if you purchase through my links, at no extra cost to you.
This guide walks you through practical wood projects designed specifically for home crafters. You’ll discover how to transform scrap wood into beautiful creations using basic tools and straightforward techniques. Each project builds your confidence and expands your woodworking capabilities.
The beauty of home woodworking lies in its accessibility. Most projects require minimal investment and can be completed over a weekend. You’ll learn to work with different wood types, master essential techniques, and create pieces you’ll be proud to display or give as gifts.
Why Simple Wood Projects Are Perfect for Home Crafters
DIY wood projects offer numerous benefits beyond the finished product. Working with wood develops problem-solving skills and spatial awareness. Each project teaches you about measurements, angles, and construction principles that apply to countless future builds.
The therapeutic nature of woodworking cannot be overstated. Cutting, sanding, and assembling wood pieces provides a meditative break from digital screens. Many crafters find that time in their workshop reduces stress and improves mental clarity.
Financial savings make home woodworking particularly attractive. Store-bought furniture and decor often cost significantly more than DIY alternatives. A project that might sell for hundreds of dollars in retail stores can be built at home for a fraction of the cost using scrap wood or affordable lumber.
Building skills progressively is another major advantage. You start with super easy projects that build fundamental techniques. As your confidence grows, you tackle more complex designs. This natural progression keeps the hobby engaging and rewarding year after year.
Ready to Build Your Skills with Professional Plans?
Access thousands of detailed woodworking plans designed specifically for beginners. Get step-by-step instructions, material lists, and expert guidance to make every project a success.
Essential Tools and Supplies for Your First Wood Projects
Starting with the right tools makes your woodworking journey smoother and more enjoyable. Fortunately, you don’t need to invest in expensive equipment right away. A basic toolkit covers the majority of simple wood projects at home.
Must-Have Hand Tools
Tape measure and combination square for accurate measurements
Hand saw or circular saw for cutting wood to size
Cordless drill with basic bit set for drilling and driving screws
Hammer for nails and general assembly work
Sandpaper in various grits for smooth finishes
Clamps to hold pieces securely during assembly
Safety glasses and dust mask for protection
Wood and Material Basics
Pine boards offer affordability and easy workability
Plywood provides stability for larger projects
Scrap wood from previous projects reduces costs
Wood glue creates strong, lasting bonds
Screws and nails in assorted sizes
Finish options like stain, paint, or polyurethane
Wood filler for covering imperfections
Quality matters more than quantity when building your tool collection. Invest in decent tools that will last for years rather than cheap versions that need frequent replacement. Many home improvement stores offer tool rental programs if you need specialty equipment for a specific wood project.
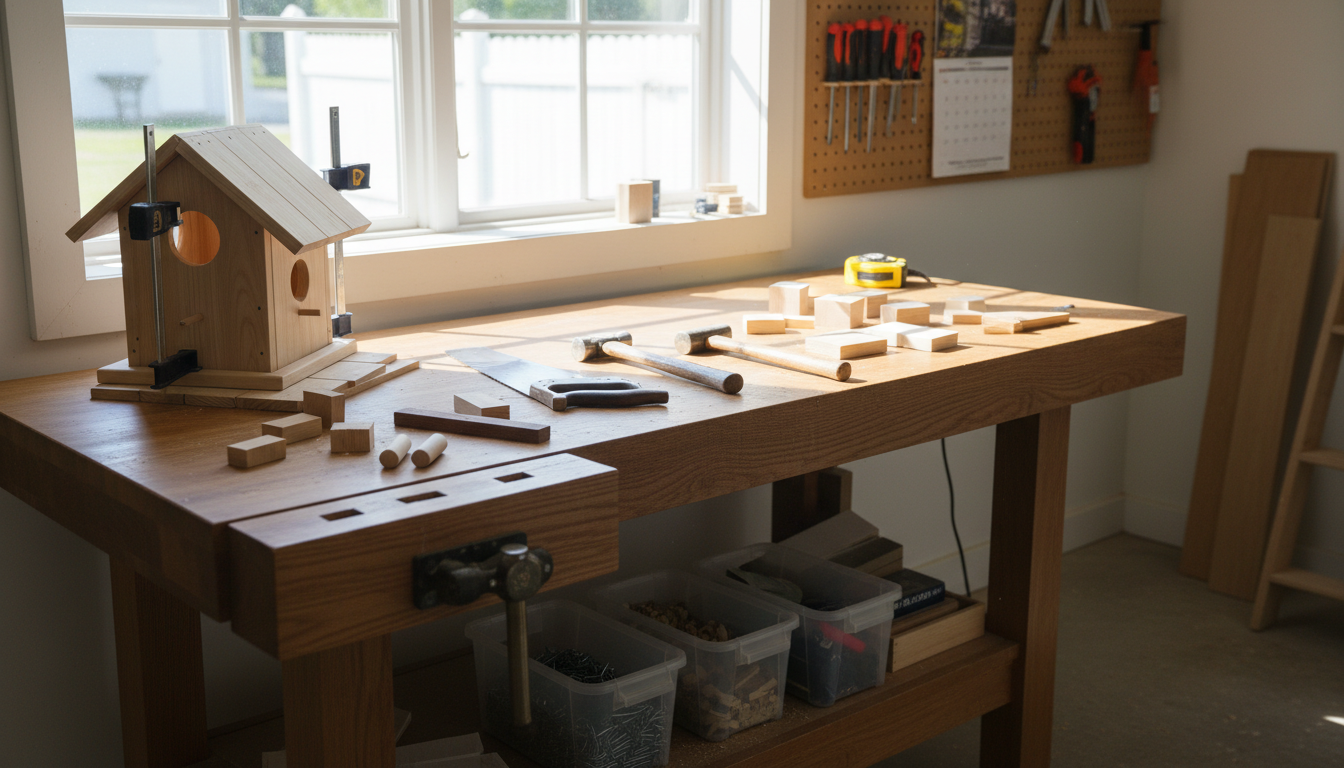
Storage and organization keep your workspace functional. Designate specific areas for tools, supplies, and materials. A pegboard on the wall provides easy access to frequently used items. Clear containers help you track screws, nails, and small hardware pieces.
Safety equipment deserves special attention. Eye protection prevents wood chips and sawdust from causing injury. A dust mask protects your lungs during sanding and cutting. Work gloves shield your hands from splinters and rough edges. These simple supplies make your woodworking time safer and more comfortable.
Super Easy Wood Projects to Start Your DIY Journey
Beginning with straightforward projects builds confidence and teaches fundamental skills. These beginner-friendly designs require minimal tools and can be completed in a few hours. Each project introduces techniques you’ll use throughout your woodworking hobby.
Picture Frames from Scrap Wood
Creating custom picture frames transforms leftover pieces scrap wood into functional art. This project teaches you about mitered corners, precise measurements, and finishing techniques. You only need four pieces of wood cut at 45-degree angles and some basic assembly skills.
The beauty of homemade frames lies in their customization. You control the size, finish, and style to match your decor perfectly. Scrap wood adds character that mass-produced frames lack. Sand the wood smooth, apply your chosen finish, and attach hanging hardware to complete the project.
Picture frames make excellent gifts and showcase your woodworking abilities. Once you master the basic technique, you can create frames in various sizes. Display family photos, artwork, or inspirational quotes in your handcrafted frames.
Simple Wooden Coasters
Wooden coasters represent one of the most super easy wood project ideas for beginners. Cut small wood squares or circles, sand them smooth, and apply a protective finish. The entire project takes less than an hour and uses minimal materials.
These functional items protect your furniture while showcasing your craftsmanship. Experiment with different wood types to create contrast in a coaster set. Add decorative edges or burn designs into the surface for personalization. Stack them with ribbon for gift-giving.
Coasters teach important lessons about wood grain direction and finish application. You learn how different sandpaper grits affect the final appearance. The small size makes them perfect for testing new techniques or finishes before attempting larger wood projects.
Transform Your Ideas Into Beautiful Projects
Stop searching for scattered tutorials and get access to a complete library of woodworking plans. Each design includes detailed diagrams, cutting lists, and professional tips to ensure your success.
A serving tray combines form and function in an attractive package. This diy wood project requires a flat board for the base and four side pieces to create walls. Add handles on each end for easy carrying. The design allows for creativity in handle style and finish selection.
Serving trays find uses throughout your home. Bring breakfast in bed, organize craft supplies, or display decorative items. The practical nature of this project ensures your creation sees regular use. Choose hardwoods for durability or pine for an affordable option.
Construction techniques for trays apply to many other projects. You learn about creating stable bases, attaching sides securely, and achieving professional-looking corners. These skills transfer directly to more complex builds like boxes, planters, and small furniture pieces.
Creative Scrap Wood Projects That Minimize Waste
Scrap wood projects turn leftover materials into valuable creations. Every woodworker accumulates pieces scrap wood from previous builds. Rather than discarding these remnants, transform them into useful items. This approach saves money and reduces environmental impact.
Small Wood Organizers
Desktop organizers solve storage problems while consuming minimal materials. Create compartments for pens, paper clips, and office supplies using scrap pieces. Design the layout based on your specific needs and available wood sizes. Sand all edges smooth to prevent scratches on your desk surface.
These functional organizers keep your workspace tidy and showcase your woodworking skills. Build versions for your kitchen to hold utensils, your bathroom for toiletries, or your entryway for keys and mail. The modular nature allows you to add sections as you accumulate more scrap wood.
Organizer projects teach precision in small-scale construction. You practice measuring tight-fitting compartments and creating stable structures. The compact size means you can complete multiple organizers in an afternoon, making them perfect for craft fairs or gift-giving.
Rustic Wood Wall Art
Wood wall art transforms random scrap pieces into stunning visual displays. Arrange small wood pieces in geometric patterns, create gradient effects with different wood tones, or build dimensional designs. The artistic nature of these projects allows for complete creative freedom.
Wall art projects require no specific woodworking skills beyond cutting and attaching pieces. Focus on composition, color contrast, and visual balance. Mount pieces on a backing board for stability, then hang the completed art in any room that needs a focal point.
This type of diy project encourages experimentation without pressure. If you don’t like the arrangement, simply rearrange the pieces. Try different patterns, add painted elements, or incorporate other materials like metal or rope. Each piece becomes unique to your vision.
DIY Cutting Board from Scraps
A diy cutting board represents a practical scrap wood project with daily utility. Select hardwood scraps like maple, walnut, or cherry for food-safe surfaces. Glue pieces together to create interesting patterns or stick with a simple single-board design.
Proper finishing ensures food safety and longevity. Sand the board progressively through fine grits for a silky smooth surface. Apply food-grade mineral oil to protect the wood and enhance grain patterns. Regular oiling maintains the board’s appearance and prevents cracking over time.
Cutting boards make thoughtful gifts and demonstrate your attention to detail. Create various sizes for different kitchen tasks. Couple a handmade board with a set of wooden utensils for a complete kitchen gift set. The functional nature guarantees your creation will be appreciated and used regularly.
Building furniture might seem intimidating, but many designs work perfectly for beginners. Start with simple structures that don’t require complex joints or specialized tools. These wood projects upgrade your living space while teaching valuable construction techniques.
Basic Wooden Bench
A wooden bench provides versatile seating for entryway, mudroom, or outdoor space. The basic design consists of a seat board supported by two or more legs. Add a backrest for comfort or keep it simple for easy construction. This project introduces you to creating sturdy, load-bearing furniture.
Bench construction teaches important concepts about weight distribution and structural integrity. You learn to select appropriate board thickness and reinforce joints properly. The size flexibility means you can customize the bench to fit any available space in your home.
Finishing options transform a basic bench into a design statement. Paint it bold colors for a modern look, stain it for traditional appeal, or leave it natural for rustic charm. Add cushions or upholstery for additional comfort and style customization.
Simple Nightstand
A nightstand project combines storage with functional surface area. Build a basic box structure with an open front, add a shelf inside, and top it with a flat board. This straightforward design requires minimal cutting and assembly but delivers professional-looking results.
Nightstands offer practical storage beside your bed for books, phones, and bedside necessities. The compact size makes them manageable first furniture projects. Experiment with different heights and widths to match your bed frame and room layout perfectly.
Building a nightstand teaches box construction principles that apply to countless future projects. You practice creating square corners, attaching tops securely, and ensuring stability. These techniques transfer to building larger furniture pieces like desks, cabinets, and media centers.
Floating Shelves
Floating shelves create storage and display space without visible brackets. These wood wall additions work in every room from kitchen to bathroom to office. The clean, modern aesthetic suits contemporary homes while providing practical organization solutions.
Construction involves attaching a cleat to the wall and sliding the hollow shelf over it. This technique creates the floating appearance while maintaining strong support. Choose board thickness based on intended use and desired visual weight. Finish all sides of the shelf since multiple angles remain visible.
Shelves demonstrate how simple designs create significant visual impact. Display books, plants, photos, or decorative objects on your handcrafted shelves. Build multiple shelves at varying lengths for an asymmetrical gallery wall effect. The minimal material requirements make this an affordable way to add storage throughout your home.
Seasonal and Decorative Wood Projects
Decorative wood projects allow creative expression while celebrating seasons and holidays. These items add personality to your home decor and make impressive gifts. Most designs use scrap wood and basic techniques you’ve already learned.
Wooden Signs and Messages
Custom wooden signs personalize your space with meaningful messages. Cut a board to your desired size, sand it smooth, and add text through painting, stenciling, or wood burning. Popular messages include family names, inspirational quotes, or humorous sayings that reflect your personality.
Signs work in any room and suit multiple decorating styles. Create distressed finishes for farmhouse charm, sleek painted designs for modern spaces, or natural wood looks for rustic appeal. The simple construction makes this project accessible even for absolute beginners.
Seasonal signs let you rotate decor throughout the year. Build interchangeable sign boards that fit into the same frame. Create versions for different holidays, seasons, or occasions. This approach maximizes your creative output while minimizing storage needs.
Holiday Decorations
Wooden holiday decorations become family treasures passed down through years. Build Christmas trees from painted boards, create fall pumpkins from scrap wood rounds, or craft Easter bunnies from cutout shapes. These projects combine woodworking with artistic decoration.
Holiday projects often require minimal time investment, making them perfect for busy schedules. Complete several designs in a single weekend. Gift them to friends and family or sell them at craft fairs during the holiday season. The nostalgic appeal of wooden decorations never goes out of style.
These projects teach decorative techniques beyond basic construction. You learn about layering paint colors, applying distressed finishes, and adding embellishments. Skills developed during holiday projects enhance all your future woodworking endeavors.
Join Thousands of Successful DIY Woodworkers
Get instant access to a complete collection of woodworking plans for every skill level. Build confidence with beginner projects, then advance to impressive furniture pieces with expert guidance every step of the way.
Outdoor projects extend your woodworking beyond interior spaces. Garden and yard items endure weather exposure, requiring appropriate wood selection and finishing. These functional additions enhance outdoor living while providing valuable building experience.
Wooden Planter Boxes
Planter boxes bring gardening to patios, decks, and balconies. Build rectangular boxes from cedar or treated lumber for weather resistance. Size them to fit your space and intended plants. Add drainage holes in the bottom and optional legs to elevate the planters off the floor.
These projects combine woodworking with gardening for double the satisfaction. Grow herbs in kitchen planters, cultivate flowers on your deck, or start vegetables in raised beds. The elevated design reduces bending and creates better drainage than ground planting.
Planter construction teaches waterproofing techniques and outdoor wood selection. You learn which woods naturally resist rot and how to protect others with appropriate finishes. These lessons prove invaluable for future outdoor projects like furniture and structures.
Simple Birdhouse
Birdhouses attract wildlife to your yard while providing simple woodworking practice. Basic designs require six wood pieces assembled into a box with an entrance hole. Add ventilation holes, drainage gaps, and a removable panel for annual cleaning.
Different bird species prefer specific house dimensions and entrance sizes. Research local birds to build appropriate houses for your area. Mount finished houses on poles or hang them from trees. Position them away from prevailing winds and with partial shade for bird comfort.
Birdhouse projects often become family activities. Involve kids in decorating and painting the exterior. Create multiple houses for a backyard bird community. The modest size and quick build time allow you to complete several in a couple of hours.
Garden Tool Organizer
A garden tool organizer keeps rakes, shovels, and other equipment accessible and protected. Build a wall-mounted rack with hooks or slots for different tool types. Alternatively, create a freestanding storage unit that sits in your garage or shed.
Proper tool storage extends equipment lifespan and improves garage organization. Design the organizer based on your specific tool collection. Include sections for long-handled tools, small hand tools, and gardening supplies. Add a shelf on top for gloves, seed packets, and other accessories.
This project introduces utility construction focused on function over aesthetics. You learn to design around specific storage needs and create durable structures for heavy items. The practical application demonstrates how woodworking solves real-world organizational challenges.
Essential Woodworking Techniques for Home Projects
Mastering fundamental techniques ensures successful project outcomes. These core skills apply across all wood projects regardless of complexity. Focus on accuracy and safety as you develop your capabilities.
Accurate Measuring and Marking
Precision begins with proper measuring. The old adage “measure twice, cut once” prevents costly mistakes and wasted materials. Use a quality tape measure for longer distances and a combination square for marking cut lines and checking angles.
Measuring Best Practices
Always measure from the same reference edge
Mark measurements clearly with a sharp pencil
Double-check critical measurements before cutting
Account for blade thickness in your calculations
Use stop blocks for repeated cuts of the same size
Cutting Techniques
Secure wood firmly before cutting to prevent movement
Cut on the waste side of marked lines
Use appropriate saw blades for your material
Let the tool do the work rather than forcing cuts
Wear safety glasses during all cutting operations
Sanding for Smooth Finishes
Sanding transforms rough wood into silky smooth surfaces ready for finishing. Start with coarser grits to remove mill marks and imperfections, then progress through finer grits for final smoothing. Always sand in the direction of the wood grain to avoid visible scratches.
The sanding process requires patience but delivers professional results. Spend adequate time on this step rather than rushing to finish. Feel the wood surface with your hand to detect any remaining rough spots. Wipe away dust between grit changes to prevent contamination.
Different projects require different sanding approaches. Furniture and decorative items benefit from ultra-smooth finishes achieved with very fine sandpaper. Utility projects like shop organizers may need only moderate sanding. Adjust your technique based on the project’s end use and visibility.
Joining Wood Pieces
Strong joints ensure your projects remain stable through years of use. Basic joining methods include screws, nails, and wood glue. Each technique has appropriate applications based on joint stress, visibility, and material thickness.
Wood glue creates incredibly strong bonds when applied correctly. Spread thin, even layers on both surfaces, clamp pieces together firmly, and allow full drying time before removing clamps. Excess glue wipes away easily with a damp cloth before it dries.
Screws provide adjustable connections and work well for projects that may need disassembly. Pre-drill pilot holes to prevent wood splitting, especially near board edges. Countersink screw heads for a flush surface or use decorative screws as design elements.
Finishing Touches That Make Your Projects Shine
Proper finishing protects your work and enhances natural wood beauty. The finish you choose affects both appearance and durability. Consider the project’s location, use, and desired aesthetic when selecting finishing products.
Staining Wood
Stain adds color while allowing wood grain to show through. Test stain colors on scrap pieces before applying to your project. Apply with a brush or cloth, let it penetrate briefly, then wipe away excess for even color. Multiple coats create deeper tones.
Different wood types absorb stain differently. Softwoods like pine may develop blotchy areas without pre-treatment using wood conditioner. Hardwoods typically accept stain more evenly. Always stir stain thoroughly before use to distribute pigments evenly.
Allow adequate drying time between stain coats and before applying protective topcoats. Rushing this process leads to sticky surfaces and compromised durability. Follow manufacturer recommendations for specific products you choose.
Painting Techniques
Paint offers complete color coverage and endless design possibilities. Prepare wood surfaces by filling any holes or gaps with wood filler, then sand smooth. Apply primer for better paint adhesion and color coverage, especially on raw wood.
Quality paint and brushes produce superior results. Use multiple thin coats rather than one thick coat to prevent drips and ensure even coverage. Sand lightly between coats with very fine sandpaper for a professional finish. Choose paint sheens based on desired appearance and cleanability needs.
Specialty paint techniques add interest to simple projects. Try distressing for vintage appeal, use stencils for patterns, or create ombre effects with multiple colors. These decorative approaches transform basic wood project into unique artistic pieces.
Protective Topcoats
Clear topcoats protect your work from moisture, scratches, and daily wear. Polyurethane provides durable protection for high-use items like cutting boards and furniture. Wax offers softer protection suitable for decorative pieces with lower handling.
Application method affects the final appearance. Brush-on polyurethane works well for flat surfaces but may show brush marks. Wipe-on versions produce thinner coats with fewer application marks. Spray products deliver the smoothest finish but require proper ventilation and technique.
Build up protection gradually with multiple thin coats rather than one thick application. Sand lightly between coats to ensure proper adhesion and eliminate dust particles. The extra effort produces glass-smooth surfaces that showcase your woodworking quality.
Build With Confidence Using Expert Plans
Stop guessing and start building with detailed plans that eliminate confusion. Get precise measurements, professional techniques, and insider tips that guarantee beautiful results on every project you tackle.
Success in woodworking comes from both skill development and smart work habits. These practical tips help you avoid common mistakes and achieve better results faster. Apply these principles to every project you undertake.
Start Simple and Progress Gradually
Resist the temptation to tackle complex projects before mastering basics. Each super easy project teaches techniques that form foundations for more advanced work. Build confidence through successful completions rather than struggling with overly ambitious designs.
Create a personal progression plan for your woodworking journey. Complete several small projects before attempting furniture. Master hand tool use before investing in power equipment. This methodical approach prevents frustration and wasted materials.
Track your projects through photos and notes. Document what worked well and what you’d improve next time. This reflection helps you learn from each build and apply lessons to future work. Over time, you’ll see remarkable skill development.
Workspace Organization Matters
An organized workspace improves efficiency and safety. Designate specific areas for different activities like cutting, assembly, and finishing. Keep tools accessible but out of the way when not in use. Clean up sawdust and scraps regularly to maintain clear work surfaces.
Good lighting prevents mistakes and reduces eye strain. Position lights to eliminate shadows across your work area. Add task lighting for detail work that requires precision. Natural light supplements overhead fixtures beautifully when available.
Storage solutions keep materials and supplies organized between projects. Vertical storage maximizes limited floor space. Label containers clearly so you can find items quickly. Invest time in organization systems that support your workflow rather than hindering it.
Learn From Each Project
Every wood project provides learning opportunities whether it succeeds perfectly or encounters challenges. Analyze what contributed to success and what caused difficulties. Apply these insights to improve your approach on subsequent builds.
Questions to Ask After Each Project
What techniques worked well for this design?
Which steps caused the most difficulty?
How could I improve efficiency next time?
Did I use appropriate materials and tools?
What would I change about the design?
Skills to Practice
Accurate measuring and layout
Clean, straight cuts
Strong, invisible joints
Smooth, even finishing
Problem-solving when things don’t fit perfectly
Embrace mistakes as valuable teachers rather than failures. Most woodworking errors can be fixed with creative solutions. Wood filler hides gaps, sanding removes small errors, and strategic paint placement covers imperfections. Problem-solving develops skills that serve you throughout years of crafting.
Connect with other woodworkers through online communities, local clubs, or classes. Sharing experiences and learning from others accelerates your skill development. Ask questions, share your work, and celebrate successes with fellow enthusiasts who understand the craft.
Start Building Simple Wood Projects at Home Today
Your woodworking journey begins with that first project. The simple wood projects at home described throughout this guide provide accessible entry points regardless of your current skill level. Each completed build increases your confidence and expands your capabilities.
Remember that every expert woodworker started exactly where you are now. They learned through practice, made mistakes, and gradually refined their skills over time. The same path awaits you. What matters most is taking that first step and committing to the learning process.
Gather your basic tools and materials this weekend. Choose one beginner-friendly project from this guide that excites you. Follow the techniques discussed, take your time, and enjoy the process of creating something with your own hands. The satisfaction of completing your first wood project will fuel your motivation for the next one.
Woodworking at home offers rewards that extend beyond the finished pieces. You develop patience, attention to detail, and problem-solving abilities. You create functional items that serve your household needs while expressing your personal style. Most importantly, you discover a fulfilling hobby that can last a lifetime.
Your workshop awaits, whether it’s a dedicated garage space or a small corner of your apartment. The projects you’ll create start with simple boards and basic tools but result in beautiful, functional items you’ll be proud to use and display. Start your woodworking journey today and discover the joy of building with your own hands.
Your Woodworking Success Starts Here
Get instant access to the most comprehensive collection of woodworking plans available. Join thousands of satisfied builders who transformed their skills and created beautiful projects with expert guidance. Every plan includes detailed instructions, material lists, and professional tips to ensure your success from start to finish.
Your smile speaks before you do. Yellow or stained teeth can affect your confidence in social situations and professional settings. The good news is you don’t need expensive dental treatments to achieve a brighter smile.This Website contains affiliate links. That means I may earn a small commission if you purchase through my links, at no…
Anniversaries mark the beautiful journey you’ve shared together—each year a testament to your love, growth, and commitment. Finding the perfect anniversary gift for her isn’t just about checking a box on your calendar; it’s about celebrating the woman who makes your life extraordinary. Whether you’re commemorating your first year together or your fiftieth, the right…
Your wedding day is a celebration of love, and what better way to express gratitude to those who share in your joy than with meaningful wedding gifts for guests? These tokens of appreciation not only thank your guests for their presence but also serve as lasting mementos of your special day. Finding the perfect wedding…
Creating the perfect smoothie can transform your weight loss journey. Many people struggle with diet plans that feel restrictive or complicated. Smoothies offer a simple solution that combines nutrition, convenience, and taste into one powerful meal replacement or supplement.This Website contains affiliate links. That means I may earn a small commission if you purchase through…
There’s something incredibly special about giving a handmade gift. When you create DIY gifts for boyfriend, you’re not just giving him a present—you’re giving him your time, creativity, and a piece of your heart. Whether you’re celebrating his birthday, your anniversary, Valentine’s Day, or just want to surprise him “just because,” these handcrafted gift ideas…
Losing weight quickly feels like an impossible challenge. You have tried countless diet plans and exercise routines. Yet the scale refuses to budge in the direction you want.This Website contains affiliate links. That means I may earn a small commission if you purchase through my links, at no extra cost to you. Many people share…