Beginner Woodworking Projects: 25 Easy Ideas to Start Your Journey

Starting your woodworking journey can feel overwhelming. You see beautiful furniture and wonder if you could ever create something similar. The truth is simpler than you think.
This Website contains affiliate links. That means I may earn a small commission if you purchase through my links, at no extra cost to you.
Every master woodworker started exactly where you are now. They picked up basic tools and tackled simple projects. Each piece taught them something new.
This guide walks you through twenty-five beginner woodworking projects that build your skills step by step. You will learn essential techniques while creating functional pieces for your home. No expensive tools required.
These projects use common materials you can find at any hardware store. Most take just a few hours to complete. You will gain confidence with each finished piece.
Getting Started with Woodworking: Essential Tools and Materials
Before diving into projects, you need basic tools and an understanding of wood types. This foundation makes every project easier and more enjoyable.
Basic Tool Collection for Beginners

Starting with the right tools saves money and frustration. You do not need a full workshop to begin. A handful of quality basics will handle most beginner projects.
Measuring and Marking Tools
Accurate measurements make the difference between success and failure in woodworking.
- Tape measure (25-foot minimum)
- Combination square for right angles
- Pencil and marking knife
- Level for checking flat surfaces
Cutting Tools
These tools shape your wood into the pieces you need for assembly.
- Hand saw or circular saw
- Miter box for angled cuts
- Utility knife for detail work
- Sandpaper in various grits
Joining Tools
Connecting wood pieces securely requires specific tools and materials.
- Cordless drill with bit set
- Hammer for nails and adjustments
- Clamps to hold pieces during gluing
- Screwdriver set (flathead and Phillips)
Finishing Tools
The final touches transform rough wood into polished pieces.
- Orbital sander or sanding blocks
- Paintbrushes for stain and finish
- Safety glasses and dust mask
- Work gloves for hand protection
Choosing the Right Wood for Your Project
Different wood types suit different projects. Understanding basic wood characteristics helps you select the best material for each piece.

Pine remains the most popular choice for beginners. This softwood costs less than hardwoods and cuts easily with basic tools. It accepts stain well and works perfectly for indoor furniture.
Plywood offers stability for larger projects. The layered construction resists warping better than solid wood. You will find it ideal for shelves, boxes, and table surfaces.
Cedar brings natural beauty and weather resistance. This wood works great for outdoor projects like planters or door decorations. The pleasant aroma adds a bonus to your workshop experience.
Hardwoods like oak and maple provide durability but require more experience. Save these for later projects when your skills improve. The extra cost justifies itself in heirloom-quality pieces.
Ready to Master Professional Woodworking Techniques?
Access over 16,000 detailed project plans with exact measurements, cutting lists, and step-by-step instructions. Join thousands of beginners who transformed into confident woodworkers.
Simple Storage Solutions: Boxes and Organizers
Storage projects teach fundamental woodworking skills while creating useful items. These beginner woodworking projects introduce basic joinery and assembly techniques.
Basic Wooden Box

A wooden box represents the perfect first project. You learn to measure, cut, and join wood pieces while creating functional storage. The simple design builds confidence quickly.
Cut six pieces of pine: four sides, one bottom, and one lid. Use wood glue and finishing nails to attach the sides. The bottom piece fits inside the four walls.
Sand all surfaces smooth before assembly. This step matters more than most beginners realize. Smooth wood accepts finish evenly and feels pleasant to touch.
Add small hinges to attach the lid. You could use magnetic catches to keep it closed. A coat of stain or paint personalizes your box.
Desktop Organizer

Office supplies always need a home. This desktop organizer uses scrap wood to create compartments for pens, paper clips, and other small items. The project takes about two hours.
Start with a base piece measuring about eight inches by twelve inches. Cut divider pieces to create separate compartments. Different heights add visual interest and functionality.
Drill pilot holes before screwing pieces together. This prevents wood from splitting. A couple of coats of polyurethane protects the wood from daily use.
Tool Caddy

Carrying tools between projects becomes easier with a dedicated caddy. This simple woodworking project uses a center handle and divided compartments. You can customize the size based on your tool collection.
Two side pieces connect with a bottom board. The handle piece divides the space in half. All pieces attach with wood glue and screws for strength.
Round over the handle edges with sandpaper. Sharp edges become uncomfortable during extended use. Consider adding a leather wrap for extra grip comfort.
Wall-Mounted Projects: Shelves and Racks
Wall space offers excellent opportunities for beginner projects. These designs add functionality while teaching important mounting and leveling skills.
Floating Shelves

Floating shelves create storage without visible brackets. The clean look suits modern homes perfectly. This project teaches precise drilling and wall mounting techniques.
Cut a board to your desired length. Thick wood (two inches minimum) provides the best floating effect. Sand all surfaces until completely smooth.
Install hidden brackets into wall studs first. Drill corresponding holes in the back of your shelf board. The shelf slides onto the brackets and appears to float.
Level matters critically for shelves. A crooked shelf ruins the entire look of a room. Use a quality level during installation and double-check before securing.
Coat Rack

Every home needs a dedicated spot for coats and bags. A simple wall-mounted coat rack solves this problem while adding rustic charm. You will finish this piece in under an hour.
Select a board long enough to accommodate your desired number of hooks. Distressed or reclaimed wood adds character. Four to six hooks serve most families well.
Mark hook positions evenly across the board. Drill pilot holes to prevent wood splitting when you screw in the hooks. Mount the entire piece to wall studs for maximum strength.
Picture Ledge Shelf

Traditional picture frames require nail holes. A picture ledge lets you change displayed photos easily. The small lip keeps frames secure while leaning against the wall.
You need two pieces: a back board that mounts to the wall and a smaller front lip. The lip attaches at a right angle to the back piece, creating a narrow shelf.
Space multiple ledges vertically to create a gallery wall effect. This design works beautifully in hallways or above furniture. Stain or paint to match your existing decor.
Build Like a Professional Craftsman
Learn advanced techniques from master woodworkers. Get detailed video tutorials showing every cut, joint, and finish. Avoid costly mistakes with expert guidance every step of the way.
Simple Furniture Projects for Beginners
Creating furniture might seem ambitious for beginners. These projects prove you can build functional pieces with basic skills and tools. Each design focuses on straightforward construction methods.
Step Stool

A step stool provides essential help in kitchens and closets. This two-step design offers stability and safety. The project introduces basic furniture construction principles.
Cut two side pieces that form the stair-step shape. Two horizontal pieces create the actual steps. A couple of support pieces underneath add strength and prevent wobbling.
Use wood screws rather than nails for this project. Screws hold much better under repeated weight and stress. Countersink the screw heads so they sit flush with the wood surface.
Sand all edges thoroughly. A step stool gets grabbed frequently, and splinters ruin the user experience. Consider adding non-slip material to the step surfaces for extra safety.
Simple Coffee Table

Every living room needs a coffee table. This basic design uses common lumber and simple joints. You create a functional piece of furniture that rivals store-bought tables.
The table top consists of several boards joined edge to edge. Four legs attach to a simple apron frame. The whole structure comes together with wood glue and pocket screws.
Choose your wood based on the desired final look. Pine creates a farmhouse style. Cedar brings natural warmth. Plywood topped with edge banding offers an economical option.
Finish options range from clear polyurethane to dark walnut stain. Multiple thin coats work better than one thick application. Sand lightly between coats for a professional result.
Bench Seat

A simple bench serves multiple purposes throughout your home. Place it in an entryway for shoe removal or at the foot of a bed. The straightforward construction makes it an ideal beginner woodworking project.
Four legs support a single plank seat. Cross braces between the legs prevent wobbling and add visual interest. The seat board should be thick enough to support weight without flexing.
You could add a lower shelf between the legs for shoe storage. This extra piece requires minimal additional work but greatly increases functionality. Consider the end use when determining final dimensions.
Outdoor Woodworking Projects
Outdoor projects let you work with weather-resistant wood and practice different finishing techniques. These pieces enhance your yard while building your woodworking skills.
Planter Box

Garden planters add charm to porches and patios. Cedar naturally resists rot and insects, making it perfect for outdoor use. This project teaches box construction with drainage considerations.
Build a rectangular box using four side pieces and a bottom board. Drill several drainage holes in the bottom piece before assembly. Plants need water to escape or roots will rot.
Leave the cedar untreated for a natural silver-gray patina over time. Alternatively, apply an outdoor wood sealer to maintain the original color. Both options protect the wood adequately.
Line the inside with landscape fabric before adding soil. This prevents soil from washing through drainage holes while allowing water to pass. Your planter will last many years with this simple addition.
Garden Tool Rack

Garden tools lean against walls and create clutter. A dedicated rack keeps everything organized and off the ground. This wall-mounted solution takes less than two hours to complete.
A long horizontal board mounts to your shed or garage wall. Attach tool holders along its length – either commercial hooks or carved notches work well. Space them according to your specific tools.
Mount the rack high enough that tool handles do not touch the ground. This prevents moisture damage and keeps working ends clean. Consider adding a small shelf on top for gloves and hand tools.
Bird Feeder

Bird feeders attract wildlife while showcasing your woodworking skills. The simple design requires minimal materials and creates an enjoyable outdoor focal point. Children especially love watching visiting birds.
Build a basic platform with raised edges to contain seeds. Add a roof overhead to protect food from rain. Four corner posts support the roof structure.
Drill small drainage holes in the platform floor. Rain will inevitably enter, and standing water spoils seeds quickly. Position the feeder where you can easily refill it and enjoy watching visitors.

Weather Protection Tips
Outdoor wood needs special care. Use cedar or treated lumber for longevity. Apply water-resistant finishes to prevent damage from rain and sun exposure.

Hardware Selection
Regular screws rust quickly outdoors. Invest in galvanized or stainless steel hardware for outdoor projects. The small extra cost prevents failure and ugly rust stains.

Maintenance Schedule
Outdoor projects need annual maintenance. Inspect for damage each spring. Reapply protective finish every couple of years to maintain beauty and extend the life of your work.
Decorative Wood Projects for Your Home
Decorative pieces let you experiment with design while practicing your skills. These projects add personal touches throughout your space and make excellent gifts.
Wooden Wall Art

Wood creates stunning wall art through simple arrangements. Different wood tones and grain patterns form natural designs. This project encourages creativity while teaching precise cutting and arrangement.
Cut wood pieces into geometric shapes – triangles, rectangles, or hexagons work well. Arrange them on a backing board to create patterns or abstract designs. Experiment with layout before gluing permanently.
Mix different wood species for color variation. Walnut, maple, and cherry create beautiful contrast without any stain. The natural tones blend harmoniously while providing visual interest.
Mount the finished piece using French cleats for easy hanging and removal. This professional mounting method distributes weight evenly and allows for adjustment after installation.
Wooden Serving Tray

A serving tray combines beauty and function perfectly. This piece makes breakfast in bed special or organizes items on a coffee table. The project teaches edge work and handle creation.
Start with a solid wood board or create a panel by gluing boards together edge to edge. Add sides around the perimeter to contain items. Handles on the short ends make carrying comfortable.
You can cut handle openings with a jigsaw or drill. Sand the edges extensively so hands never encounter rough spots. A food-safe finish like mineral oil protects the wood while remaining safe for contact with dishes.
Picture Frame

Custom picture frames add personal touches to displayed memories. Learning to cut perfect miter joints challenges beginners while teaching precision. Each frame becomes a gift opportunity or decorative element.
Cut four pieces at precise forty-five degree angles. The joints must meet perfectly for a professional look. A miter box guides your saw for accurate cuts every time.
Glue and clamp the corners carefully. Small finish nails add extra strength to the joints. A piece of glass or acrylic protects the photo while a backing board holds everything in place.
Cutting Board

A cutting board represents one of the most practical beginner woodworking projects. The piece serves daily kitchen duty while showcasing beautiful wood grain. Hardwoods work best for durability and food safety.
Edge-glue several hardwood boards together to create width. Maple, walnut, and cherry are popular choices. Alternate wood species for decorative stripes if desired.
Sand progressively through finer grits until the surface feels glass-smooth. Apply food-safe mineral oil or butcher block conditioner. This protects the wood from moisture and prevents bacteria growth.
Round over all edges and corners for comfortable handling. Sharp corners dig into hands during use. A simple roundover bit in a router creates the perfect edge profile quickly.
Games and Toys: Fun Woodworking Projects
Building games and toys brings extra joy to woodworking. These projects combine functionality with play and make memorable gifts for children and adults alike.
Tic-Tac-Toe Board

A classic game becomes a decorative conversation piece when crafted from wood. This simple project teaches layout skills and introduces woodburning or carving as decoration options.
Create a square board and divide it into nine sections with grooves or burned lines. Make game pieces from contrasting wood – five of one color, four of another. Store pieces in a small drawer beneath the board or in an attached bag.
The grid can be created several ways. Route shallow grooves, burn lines with a woodburning tool, or paint stripes. Each method produces different aesthetic results.
Toy Car

Wooden toys carry timeless appeal and provide safer alternatives to plastic. A simple toy car teaches wheel attachment and safe edge rounding. Children love toys made by family members.
Cut a basic car shape from thick wood stock. Round all edges completely to eliminate sharp corners. Drill axle holes precisely so wheels turn freely.
Wooden wheels with dowel axles create the rolling mechanism. Glue wheels onto the dowel but allow the dowel to spin freely in the car body. Apply non-toxic finish safe for children who might mouth the toy.
Cornhole Game Boards

Cornhole brings people together at gatherings and parties. Building a set teaches angled cuts and large panel construction. This project creates a game that provides years of outdoor entertainment.
Each board requires a plywood panel, frame pieces, and angled legs. Cut a circular hole near the top of each panel. The legs attach at specific angles to create the proper playing slope.
Paint the boards in team colors or apply outdoor stain for natural beauty. Polyurethane or outdoor sealer protects against weather. Store indoors or cover when not in use to extend board life significantly.
Transform Your Hobby into Expert-Level Craftsmanship
Stop guessing and start building with confidence. Access professional woodworking courses, detailed plans for hundreds of projects, and exclusive techniques from master craftsmen. Your dream workshop awaits.
Seasonal and Holiday Woodworking Projects
Seasonal decorations add festive touches to your home throughout the year. These projects let you celebrate holidays with handmade charm while practicing new techniques.
Wooden Door Hanger

Door hangers welcome guests and showcase seasonal spirit. These simple decorations change with holidays and seasons. The basic shape stays the same while paint or decorations vary.
Cut wood into your chosen shape – circle, rectangle, or decorative outline. Sand smooth and apply base paint color. Add seasonal designs with additional paint, stencils, or attached decorations.
Drill a hole at the top for hanging ribbon or wire. Seal with outdoor polyurethane so decorations survive weather exposure. Create multiple versions for different seasons and swap them throughout the year.
Advent Calendar

An advent calendar becomes a treasured family tradition. This woodworking project creates excitement throughout December. Small drawers or doors hide daily surprises for children and adults.
Build a cabinet with twenty-four small compartments. Each section needs a tiny door or drawer that opens to reveal the space inside. Number each door from one to twenty-four.
Dimensions depend on what you will place inside – small candies need less room than toys. Consider making compartments different sizes to accommodate various surprises. Paint in festive colors or leave natural wood showing.
Wooden Pumpkins

Wooden pumpkins never rot and return year after year. These fall decorations suit porches, mantles, and tablescapes. The simple construction works beautifully with reclaimed or pallet wood.
Stack wood pieces horizontally to create pumpkin shapes. Each layer should be slightly smaller than the one below, creating curves. A small piece of branch serves as the stem.
Paint orange or leave natural – both looks work well. Distressing painted versions adds farmhouse charm. These pumpkins mix beautifully with real gourds in autumn displays.
Challenging Projects for Advancing Beginners
As your skills grow, these slightly more complex projects offer new challenges. Each design introduces techniques that expand your woodworking capabilities.
Bookshelf

Every home needs book storage. A simple bookshelf teaches shelf support methods and how to work with longer boards. This piece transforms a room while showcasing your developing skills.
Two side pieces form the vertical supports. Shelves fit between these sides using dado joints, shelf pins, or simple brackets. Spacing between shelves depends on your book collection and decorative items.
A back panel adds stability and prevents the shelf from racking side to side. Plywood works well for this piece since it remains hidden. Anchor tall bookshelves to walls for safety, especially in homes with children.
Kitchen Island Cart

A mobile kitchen island adds valuable workspace and storage. This project combines multiple woodworking techniques including wheel installation and butcher block construction. The finished piece serves as both furniture and tool.
Build a basic cabinet frame with shelves or drawers for storage. The top surface should be thick hardwood suitable for food preparation. Locking casters allow the cart to move when needed but stay secure during use.
Consider adding a towel bar on one end and hooks on the side for utensils. These functional additions make the cart more useful. A power strip inside can provide convenient outlets for appliances.
Entryway Table

Narrow console tables suit entryways and hallways perfectly. This simple piece provides surface space without blocking pathways. The design teaches basic table construction with legs and aprons.
Four legs connect with horizontal aprons forming a rectangle. The table top sits on this frame. A lower shelf between the legs adds storage and visual weight to the piece.
Keep the depth narrow – twelve inches works for most spaces. Length varies based on available wall space. Finish to match existing furniture or make it a statement piece with contrasting color.
Skill Progression Path
Start with boxes and shelves. Progress to furniture as confidence builds. Each project teaches techniques you will use for years. Build your skills systematically for best results and sustained enjoyment.
Tool Investment Strategy
Buy quality tools gradually as projects demand them. Cheap tools frustrate beginners and produce poor results. One excellent tool beats five mediocre ones every single time you work wood.
Community Connection
Join woodworking groups online and locally. Fellow woodworkers share advice, troubleshoot problems, and celebrate successes. Learning from experienced makers accelerates your growth dramatically.
Essential Woodworking Techniques Every Beginner Should Master
Success in woodworking depends on mastering fundamental techniques. These skills form the foundation for every project you undertake. Practice them repeatedly until they become second nature.
Accurate Measuring and Marking

Precise measurements determine project success or failure. A piece cut too short becomes scrap. Taking time to measure twice prevents costly mistakes and wasted materials.
Always use a sharp pencil for marking. Thick pencil lines create confusion about exact cutting locations. Mark the waste side of each cut line so you know which side to remove.
A combination square checks right angles and transfers measurements accurately. This tool becomes your constant companion. Learn to trust your square more than your eye for determining perpendicular lines.
Safe Cutting Practices

Power tools demand respect and attention. Every cut requires focus on safety first, precision second. Developing safe habits from the beginning prevents accidents throughout your woodworking life.
Always wear safety glasses when cutting wood. Flying debris can cause serious eye injuries. Keep your hands away from blade paths and use push sticks when necessary.
Secure wood firmly before cutting. Boards that shift during cuts cause binding, kickback, and dangerous situations. Clamps and vises hold work steady while both hands control the tool safely.
Wood Glue Application

Wood glue creates bonds stronger than the wood itself when applied correctly. Learning proper glue technique ensures joints last for generations. Too much glue makes messy squeeze-out, while too little creates weak joints.
Apply a thin, even layer to both surfaces being joined. Spread glue completely to edges but avoid excessive amounts. Clamp pieces together firmly but not so tight that all glue squeezes out.
Wipe away excess glue with a damp cloth before it dries. Dried glue prevents stain from penetrating wood evenly. Allow proper drying time before removing clamps or stressing the joint.
Sanding for Smooth Finishes

Sanding transforms rough wood into furniture-quality surfaces. This step separates amateur projects from professional-looking pieces. Rushing through sanding shows in the final finish.
Start with coarser grit sandpaper and progress to finer grits. Each grit removes scratches from the previous one. Skip grits and scratches remain visible under finish.
Sand with the grain direction, never across it. Cross-grain scratches show up dramatically under stain. Feel the surface frequently – your fingers detect imperfections better than your eyes.
Finishing Techniques to Enhance Your Projects
The finish you apply protects wood and highlights its natural beauty. Different finishes suit different projects and wood types. Understanding finishing options elevates your work significantly.
Staining Wood

Stain changes wood color while allowing grain patterns to show through. This finish lets you match existing furniture or create desired aesthetics. Different wood species accept stain differently.
Test stain on scrap wood first. The same stain looks completely different on pine versus oak. Find the exact color you want before applying to your finished piece.
Apply stain with a brush or cloth, working with the grain. Allow it to penetrate for the time specified on the can. Wipe away excess stain to prevent blotchy appearance.
Clear Protective Finishes

Polyurethane, lacquer, and oil finishes protect wood from moisture, scratches, and daily wear. Each finish type offers different benefits and application methods. Choose based on the project use and desired appearance.
Polyurethane provides excellent protection for surfaces that receive heavy use. Apply thin coats rather than one thick layer. Sand lightly between coats with very fine sandpaper for the smoothest result.
Oil finishes penetrate wood rather than sitting on the surface. They feel more natural and allow wood to breathe. Mineral oil works for cutting boards and food-contact surfaces safely.
Paint Finishes

Paint completely covers wood grain while providing color options limited only by imagination. Painted furniture suits cottage, farmhouse, and modern styles equally well. Proper preparation ensures paint adheres permanently.
Prime bare wood before painting. Primer seals the wood and provides a uniform surface for paint adhesion. Skip this step and paint soaks unevenly into wood creating blotchy results.
Apply multiple thin coats rather than one heavy coat. Thick paint runs and takes forever to dry properly. Light coats build coverage while maintaining smooth surfaces and preventing drips.
Achieve Flawless Furniture-Quality Finishes
Discover professional finishing secrets that transform DIY projects into heirloom pieces. Learn which products to use, application techniques, and troubleshooting common problems. Your projects deserve beautiful, durable finishes.
Setting Up Your Beginner Workshop Space
You do not need a massive garage to start woodworking. A small dedicated space with proper organization works better than a cluttered large area. Smart setup maximizes efficiency regardless of space size.
Essential Workshop Components

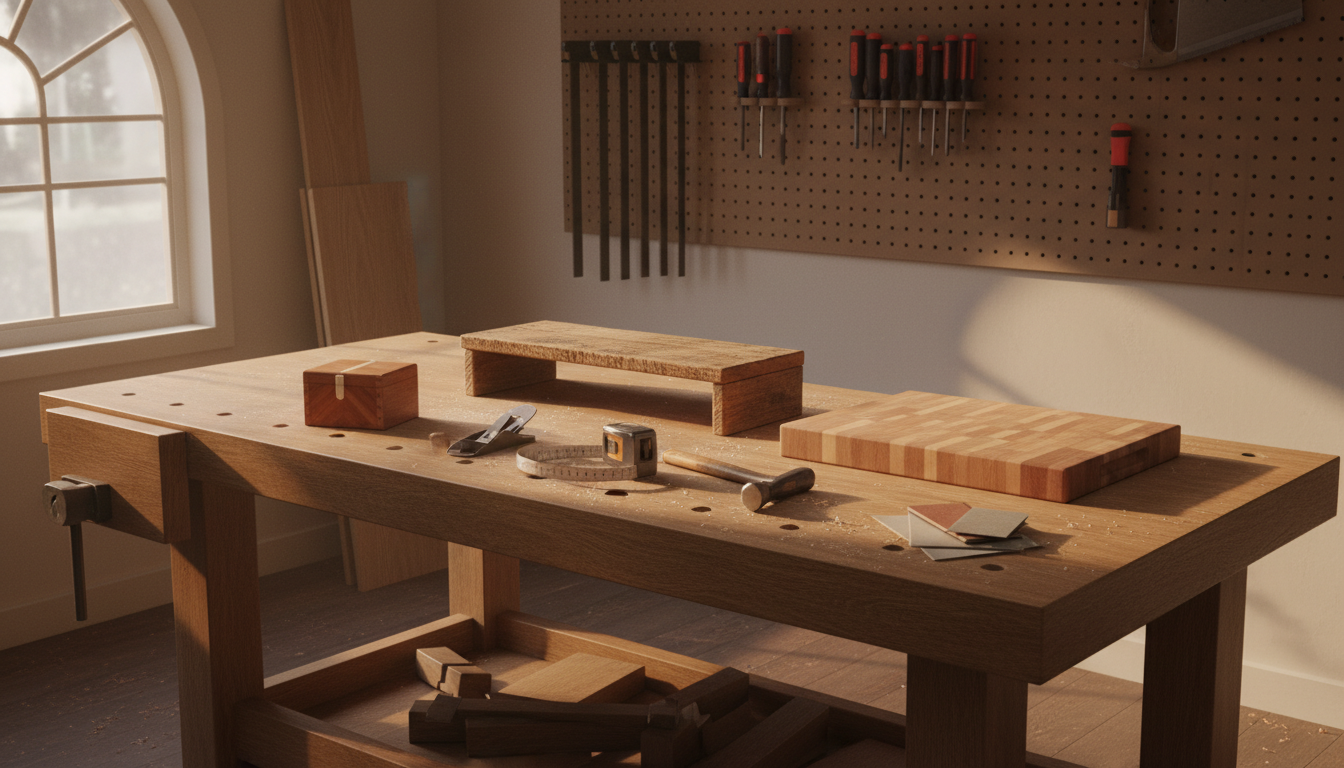
A solid workbench forms the foundation of any workshop. This surface needs to withstand hammering, clamping, and heavy use. Build your own as one of your first projects or purchase a basic model.
Good lighting prevents mistakes and eye strain. Natural light helps but task lighting directly over work areas matters most. LED shop lights provide bright, even illumination at low cost.
Tool storage keeps everything organized and accessible. Pegboards work wonderfully for hand tools. Rolling cabinets utilize floor space efficiently while remaining mobile. Clear storage containers let you see contents at a glance.
Safety Equipment and Organization

Safety gear protects you from injury and long-term health issues. Sawdust damages lungs over time. Invest in proper protection from day one of your woodworking journey.
Safety glasses guard against flying wood chips and debris. Regular glasses do not provide adequate side protection. Get dedicated safety glasses and wear them every single time you work.
Dust collection or shop vacuum reduces airborne particles significantly. A simple shop vacuum with hose attachments works for hand tool projects. Power tools generate enough dust to warrant dedicated dust collection eventually.
Wood Storage Solutions

Proper wood storage prevents warping and keeps materials organized. Lumber stored flat on the floor warps quickly. Vertical or horizontal racks with proper support maintain board flatness.
Store wood indoors when possible. Garages experience temperature and humidity fluctuations that affect wood stability. Climate-controlled spaces keep wood at consistent moisture content.
Organize wood by species and size. Label sections so you find needed pieces quickly. A few minutes organizing saves hours of searching through piles later.
Space-Saving Workshop Ideas
- Fold-down workbench mounts to wall when not in use
- Magnetic strips hold small metal tools on walls
- Rolling tool cart tucks under workbench
- Ceiling-mounted lumber rack uses overhead space
- Portable workbench moves outdoors for messy tasks
- Wall-mounted clamp rack keeps clamps organized

Common Beginner Mistakes and How to Avoid Them
Every woodworker makes mistakes. Learning from others’ errors saves time, money, and frustration. These common pitfalls catch most beginners at some point.
Measurement and Planning Errors

Rushing measurements leads to wasted materials and time. The old carpenter saying ‘measure twice, cut once’ exists for good reason. One minute spent double-checking saves hours of rework.
Write down measurements instead of relying on memory. Walking from measuring spot to saw allows numbers to jumble in your head. Paper eliminates this source of error completely.
Account for blade thickness when cutting. A table saw blade removes about one-eighth inch of material. This kerf affects final dimensions if you forget to factor it into measurements.
Improper Wood Selection

Choosing warped or twisted boards creates problems throughout your project. Inspect each board carefully before purchase. Sight down the length to check for straightness and twist.
Wet lumber shrinks as it dries, ruining careful joints and dimensions. Use kiln-dried wood for indoor projects. The slightly higher cost prevents disaster later.
Softwood and hardwood suit different purposes. Pine works great for painted furniture but dents easily in high-traffic areas. Match wood species to project requirements and expected use.
Skipping Sanding Steps
Inadequate sanding shows dramatically once finish goes on. Rough surfaces feel unpleasant and look amateurish. Every project deserves thorough sanding before finishing begins.
Skipping grit levels leaves visible scratches. Start coarse to remove mill marks and progress through medium to fine grits. Each step removes scratches from the previous grit.
Sand after assembly as well as before. Glue squeeze-out and small misalignments need addressing. A final sanding with fine grit creates the smoothest possible surface for finishing.
Planning Your Woodworking Projects for Success
Proper planning prevents poor performance. Taking time to plan projects thoroughly saves materials, time, and frustration. A clear plan guides every step from first cut to final finish.
Creating Cut Lists and Material Plans

A cut list details every piece needed for your project. Include dimensions, quantity, and material for each component. This document guides your work and lumber purchasing.
Plan cuts to minimize waste. Arrange pieces efficiently on boards before cutting. Sometimes buying one longer board wastes less than buying several shorter pieces.
Add extra length to measurements for safety. Cutting a piece too long allows trimming to exact size. Cutting too short creates expensive scrap. An extra inch provides a safety margin.
Sketching and Visualization

Drawing your project reveals potential problems before they occur. Sketch front, side, and top views. This exercise clarifies how pieces connect and fit together.
Graph paper makes drawing to scale easier. Assign each square a specific measurement. Proportions become clearer when drawn accurately to scale.
Digital design tools offer another option. Free software allows 3D modeling of projects. Seeing pieces from all angles catches design issues early in the planning stage.
Gathering All Materials Before Starting
Few things frustrate more than stopping mid-project for missing supplies. Gather everything needed before making the first cut. This includes wood, hardware, glue, and finishing materials.
Check your tool inventory against project requirements. Borrowing or purchasing needed tools before starting prevents work stoppages. Some tools justify purchase while others make sense to rent for single projects.
Having all materials ready maintains momentum and focus. Starting and stopping repeatedly breaks concentration. Continuous work produces better results than interrupted sessions.
Never Start a Project Unprepared Again
Get access to complete project plans with detailed cut lists, materials needed, and step-by-step assembly instructions. Every project includes multiple views, joinery details, and finishing recommendations. Build with confidence knowing every detail is planned.
Building Your Woodworking Skills Progressively
Woodworking skills develop through practice and progression. Start simple and gradually tackle more complex projects. Each piece you complete teaches lessons that apply to future work.
Learning Through Project Progression

Begin with projects using straight cuts and basic joinery. Master these fundamentals before attempting complex angles or fancy joinery. Solid foundations support advanced skills later.
Each new project should introduce one or two new techniques. Learning too many new skills simultaneously overwhelms and frustrates. Gradual progression builds confidence while expanding capabilities.
Repeat similar projects with variations. Building three different boxes teaches more than building one box once. Repetition develops muscle memory and intuitive understanding of techniques.
Documenting Your Progress

Keep a project journal documenting what you build. Include photos, notes about techniques, and lessons learned. This record becomes invaluable when planning future projects.
Write down mistakes and how you fixed them. These notes prevent repeating errors. Your own experience teaches better than any book or tutorial.
Track time spent on projects. Understanding how long tasks take improves planning for future work. Time estimates become more accurate as your experience grows.
Seeking Feedback and Improvement
Share your work with other woodworkers. Constructive criticism identifies areas for improvement you might miss. Online communities and local woodworking clubs provide supportive feedback.
Study professional work to understand quality differences. Visit furniture stores and examine construction methods. Notice joinery techniques, finish quality, and design details that make pieces exceptional.
Accept that every project teaches something new. Even master woodworkers continue learning. The combination of humility and curiosity drives continuous improvement throughout your woodworking journey.
Beginning Your Woodworking Journey with Confidence

These twenty-five beginner woodworking projects provide a solid foundation for your new hobby. Each project builds skills that carry forward to more ambitious work. You now have the knowledge to start creating.
Remember that every expert woodworker started exactly where you are today. They faced the same uncertainties and made similar mistakes. The difference between them and beginners is simply time spent practicing and building.
Start with a simple project that excites you. Gather your materials, set up a safe workspace, and make that first cut. The sense of accomplishment after completing your first piece will fuel your continued progress.
Your workshop awaits. The wood is ready. The tools are available. Everything you need to create beautiful, functional pieces already exists. Take that first step today and discover the rewarding world of woodworking.
Transform Into a Skilled Woodworker Faster
Stop struggling alone. Get instant access to comprehensive woodworking courses, thousands of detailed project plans, and expert techniques that would take years to discover on your own. Join a community of passionate woodworkers and start building your dream projects today.