A cluttered closet can make your entire morning routine frustrating. You know the feeling when you cannot find what you need because everything is piled together without proper organization.
This Website contains affiliate links. That means I may earn a small commission if you purchase through my links, at no extra cost to you.
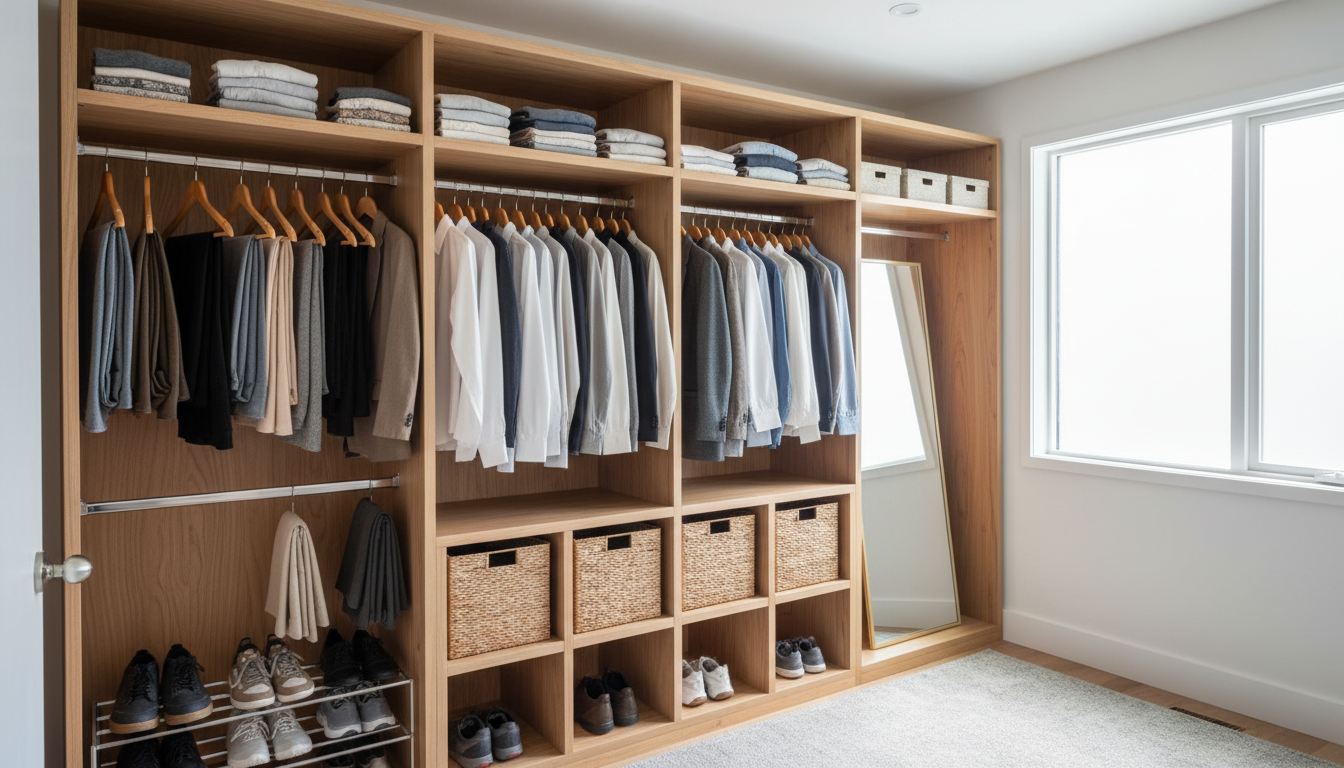
Building a diy closet organizer wood system offers the perfect solution. This project gives you complete control over the design and layout to match your specific storage needs.
This comprehensive tutorial walks you through every step of creating a custom closet organization system. You will learn exactly what materials to buy, which tools you need, and how to assemble everything properly.
The best part about this diy closet project is that you can customize it to fit any closet size. Whether you have a small reach-in closet or a larger walk-in space, these techniques work for any situation.
Many homeowners spend thousands on professional closet systems. This DIY approach costs a fraction of that amount while delivering professional-quality results. You will save money and gain valuable woodworking experience at the same time.
Planning Your Closet Layout and Taking Accurate Measurements
Proper planning prevents costly mistakes and wasted materials. You need to start this project by carefully measuring your closet space and deciding on the best layout for your needs.
Measuring Your Closet Space
Start by removing everything from your closet to get accurate measurements. Measure the width, depth, and height of the entire space from wall to wall.
Write down these measurements in a notebook. You will refer to them constantly throughout this project, so keeping them handy saves time later.
Pay special attention to any obstacles in your closet. Things like electrical outlets, vents, or light fixtures will affect your design. Mark their exact locations on your measurement sheet.
Find the wall studs using a stud finder and mark their locations with painter’s tape. Your shelves will need to attach to these studs for maximum support and stability.
Designing Your Storage Layout
Think about what you need to store in your closet. Different items require different types of storage solutions, so your design should reflect your specific wardrobe.
Most closet systems include a combination of hanging space, shelves, and sometimes drawers. A typical layout includes double hanging rods on one side for shirts and pants, with shelves on the other side.
Sketch your planned layout on paper before buying any materials. This step helps you visualize the final result and catch potential problems early in the planning process.
Standard closet measurements can guide your design. Hanging rods typically sit about twelve inches from the back wall, and the top shelf usually goes around six feet high for easy access.
Hanging Space Guidelines
Different clothing items need specific amounts of vertical space to hang properly without touching the floor or getting wrinkled.
Long dresses and coats: 69 inches minimum clearance
Pants and skirts: 45 inches of vertical space
Shirts and blouses: 38 inches hanging height
Double hanging rods: 40 inches for top, 40 inches for bottom
Shelf Spacing Standards
Proper shelf spacing makes items easy to reach while maximizing your vertical storage capacity throughout the closet.
Folded sweaters: 14 to 16 inches between shelves
Shoes on shelves: 8 to 10 inches of clearance
Purses and bags: 12 to 14 inches spacing
Storage boxes: Measure box height plus 2 inches
Depth Considerations
The depth of your shelves and hanging areas affects both storage capacity and how easy items are to access.
Standard shelf depth: 12 to 14 inches works for most items
Hanging rod depth: 12 inches from back wall minimum
Deep shelves: 16 inches for bulky items like comforters
Shallow shelves: 10 inches for shoes or accessories
Width Planning
Understanding standard widths helps you plan efficient layouts that make the best use of your available closet space.
Maximum unsupported shelf span: 36 inches for solid wood
Hanging rod sections: 48 inches maximum without support
Tower sections: 24 to 30 inches wide for cubbies
Drawer units: 18 to 24 inches typical width
Essential Tools and Materials for Your DIY Closet Organizer Wood Project
Having the right tools and materials ready before you start makes the building process much smoother. This section covers everything you need to complete your closet project successfully.
Required Power Tools
A circular saw is your most important tool for this project. It cuts the wood boards to the exact lengths you need for shelves and side pieces.
You can complete this project with just a circular saw, but a miter saw makes cleaner cuts faster. The choice depends on what tools you already own and your budget.
A drill is essential for making pilot holes and driving screws. A cordless drill gives you more freedom to move around, but a corded drill works fine too.
Make sure you have a variety of drill bits. You need regular twist bits for pilot holes and a countersink bit for recessing screw heads below the wood surface.
Hand Tools You Will Need
A tape measure is absolutely critical for accurate cuts. Get a 25-foot tape measure that locks in place so you can take measurements without help.
A level ensures your shelves sit perfectly horizontal. Even a slight tilt becomes obvious once you place items on the shelf, so take time to level everything properly.
Pencil for marking cut lines and measurements
Square for marking perpendicular lines
Stud finder to locate wall studs
Hammer for nails if you choose that method
Safety glasses to protect your eyes from sawdust
Hearing protection when using power tools
Wood and Hardware Materials
Pine boards work well for most diy closet projects because they cost less than hardwoods while still providing good strength. You can also use plywood for a different look and added stability.
Calculate how much wood you need based on your measurements and design. Add an extra ten percent to your material list to account for cutting mistakes or measurement errors.
The type of screws you use matters for long-term durability. Wood screws work best for joining boards together, while drywall screws attach the unit to wall studs through the drywall.
Wood glue adds extra strength to joints between boards. Apply glue to both surfaces before joining them, then wipe away any excess that squeezes out with a damp cloth.
Material Type
Recommended Size
Quantity Estimate
Purpose
Pine boards for shelves
1×12 inch boards
Varies by closet size
Main shelving surfaces
Plywood panels
3/4 inch thick
1-2 sheets
Side panels and backs
Wood screws
2.5 inch length
1 pound box
Joining boards together
Drywall anchors
Heavy duty rated
24 pieces
Wall attachment in drywall
Wood glue
16 ounce bottle
1-2 bottles
Strengthening joints
Closet rod
1.25 inch diameter
Per section needed
Hanging clothes
Rod brackets
Matching rod size
2 per rod section
Supporting hanging rods
Finish nails
2 inch length
Small box
Trim and facing boards
Get Professional Plans and Cutting Diagrams
Save time and avoid costly mistakes with detailed measurements, cutting lists, and professional assembly instructions. Access step-by-step plans designed for any closet size.
Accurate cuts make assembly much easier and ensure a professional-looking final result. Take your time during this step to measure twice and cut once, as the old saying suggests.
Creating Your Cut List
Write out every piece you need to cut with its exact dimensions. Organize your cut list by board size to minimize waste and make efficient use of your wood.
Label each piece on your cut list with its purpose, like “top shelf” or “left side panel.” This organization prevents confusion when you start the assembly process later.
Many home improvement stores offer cutting services for a small fee. This option works great if you do not own a saw or want perfectly straight cuts without doing the work yourself.
Making Safe and Accurate Cuts
Set up your work area in a well-lit space with plenty of room to handle long boards safely. A stable work surface at a comfortable height reduces fatigue and improves accuracy.
Mark your cut line clearly with a pencil and use a square to ensure the line is perfectly perpendicular to the board edge. A straight edge or guide helps keep your saw on track during the cut.
Clamp the board securely to your work surface before cutting. This step prevents the board from moving during the cut, which could cause an angled or uneven edge.
When using a circular saw, let the blade reach full speed before starting the cut. Push the saw steadily through the wood without forcing it, and keep the base plate flat against the board surface.
Sanding Your Cut Edges
Sand all cut edges smooth with medium-grit sandpaper after cutting. This step removes splinters and rough spots that could snag clothing or cause injuries.
Pay special attention to the front edges of shelves, as these will be most visible in the finished closet. A light sanding makes the wood feel smooth to the touch.
Wipe away all sawdust with a tack cloth or damp rag before moving to assembly. Dust prevents wood glue from bonding properly and can get trapped under paint or finish.
Constructing the Main Frame Structure
The frame provides the foundation for your entire closet system. Building a solid frame ensures your shelves stay level and can support heavy loads without sagging over time.
Assembling the Side Panels
Start by creating the two side panels that will support your shelves. These vertical pieces run from the closet floor to the ceiling or to your desired height.
Cut dados or grooves into the side panels where shelves will sit if you want the strongest possible joints. Simple shelf pins or cleats work fine for most applications and install much faster.
Apply wood glue to the joints before driving screws. This combination creates a bond much stronger than screws alone and prevents squeaking when the wood moves with temperature changes.
Pre-drill holes for screws to prevent the wood from splitting. Use a drill bit slightly smaller than the screw diameter for the pilot hole, then countersink the hole if you want screw heads below the surface.
Installing Support Cleats
Cleats are strips of wood attached to the side panels that support the shelf from underneath. This method makes shelf installation easier and allows you to adjust shelf heights if needed later.
Cut cleats about two inches shorter than the shelf depth so they do not show from the front. Attach them level at your marked shelf positions using wood glue and screws.
Double-check that opposing cleats sit at exactly the same height. Even a small difference creates a tilted shelf that looks unprofessional and functions poorly.
Adding the Top and Bottom Pieces
The top and bottom horizontal pieces connect the side panels and create a rigid box structure. These pieces prevent the sides from bowing inward or outward under the weight of stored items.
Attach these pieces from the top and bottom using screws driven through the side panels. Make sure everything stays square by measuring diagonally from corner to corner in both directions.
When the diagonal measurements match, your frame is perfectly square. If they differ, adjust the frame until both diagonals measure the same before fully tightening all screws.
Pro Tip: Build your closet organizer in sections if the closet is large. Multiple smaller units are easier to build, move into place, and level than one massive piece. You can connect the sections together once everything is positioned in the closet.
Installing Shelves and Storage Components
With the frame complete, you can now add the shelves that create your actual storage space. This step transforms the empty frame into a functional organization system.
Positioning Fixed Shelves
Fixed shelves attach permanently to the side panels for maximum strength. This design works well for shelves that will hold heavy items like folded jeans or storage boxes.
Slide each shelf onto its cleats or into its dados, then secure it with screws driven through the side panels into the shelf ends. Add a few screws through the top of the shelf into the cleats for extra support.
Use your level to make sure each shelf sits perfectly horizontal before driving all the screws. A tilted shelf becomes more noticeable once you load it with clothes or other items.
Creating Adjustable Shelf Options
Adjustable shelves let you reconfigure your closet as your storage needs change over time. Shelf pins or standards and brackets make this flexibility possible.
Drill holes for shelf pins in matching positions on both side panels. A pegboard template helps ensure all holes line up perfectly at the same heights on both sides.
Space the holes about two inches apart vertically to give yourself plenty of adjustment options. This spacing lets you fine-tune shelf heights to fit exactly what you need to store.
Installing Hanging Rods
Closet rods need solid support to handle the weight of hanging clothes without sagging. Install rod brackets into studs whenever possible for maximum strength.
Standard closet rod height is about 66 inches from the floor for a single hanging area. For double hanging sections, place the top rod at 80 inches and the bottom rod at 40 inches.
Measure carefully to position brackets at exactly the same height on both ends of the rod. An uneven rod makes clothes hang at odd angles and looks unprofessional.
Secure brackets with screws long enough to penetrate well into the wood or wall studs. Test the rod by pulling down on it firmly before loading it with clothes.
Securing Your Closet Organizer to the Wall
Attaching your closet system firmly to the wall prevents tipping and ensures safe operation. This critical safety step protects both your belongings and anyone using the closet.
Locating Wall Studs
Wall studs provide the strongest anchor points for your closet system. Use a stud finder to locate studs behind the drywall in your closet.
Mark the center of each stud with a pencil or painter’s tape. Studs typically sit 16 or 24 inches apart in most homes, so finding one helps you predict where others should be.
Verify stud locations by driving a small nail through the drywall at your marked spot. If you hit solid wood, you found a stud. If the nail pushes through easily, move slightly left or right and try again.
Attaching to Studs
Position your assembled closet unit in its final location before securing it to the wall. Check that everything sits level and plumb in both directions using your level.
Drive screws through the back panel or vertical supports directly into wall studs. Use screws at least three inches long so they penetrate deep into the studs for maximum holding power.
Add screws at multiple heights along each stud to distribute the load. Place screws near the top, middle, and bottom of your closet unit for the most secure attachment.
Using Anchors in Drywall
Sometimes stud locations do not line up perfectly with your closet unit design. Heavy-duty drywall anchors provide a secure attachment point between studs when necessary.
Choose toggle bolts or expanding anchors rated for substantial weight. Follow the package directions carefully for installation, as each anchor type requires specific hole sizes and installation techniques.
Test each anchor by pulling on it firmly before relying on it to support your closet system. A properly installed anchor should feel rock-solid with no movement or flexing.
Build With Confidence Using Expert Guidance
Avoid expensive mistakes and material waste with professional blueprints and assembly guides. Get detailed diagrams showing exactly how to secure your system safely and efficiently.
The finish you apply protects the wood and gives your closet a polished, professional appearance. This step makes the difference between a basic storage solution and a beautiful built-in feature.
Sanding Before Finishing
Sand the entire closet system thoroughly before applying any finish. Start with medium-grit sandpaper to smooth rough spots, then finish with fine-grit paper for a silky surface.
Pay extra attention to areas where boards join together. Sand these joints flush so no edges stick up above the surrounding surface.
Remove all sanding dust completely using a tack cloth or vacuum with a brush attachment. Even small amounts of dust create bumps and imperfections in your finish coat.
Choosing Your Finish
Paint offers the widest range of colors and typically costs less than stain and clear coat. White or light colors make small closets feel more spacious and reflect light well.
Staining shows off the natural wood grain and gives a warmer, more traditional appearance. Apply wood conditioner before staining pine to prevent blotchy, uneven color absorption.
Clear polyurethane over bare wood or stain adds protection against scratches and moisture. Use a water-based formula that dries clear, or oil-based for a slightly amber warm tone.
Application Techniques
Apply thin coats of paint or finish rather than one thick coat. Multiple thin layers dry faster, show fewer brush marks, and create a more durable surface.
Sand lightly between coats with very fine sandpaper once the finish dries completely. This step removes dust bumps and helps the next coat bond properly to the previous layer.
Allow adequate drying time between coats as specified on the product label. Rushing this step leads to sticky finishes that never fully harden or may peel later.
Adding Edge Banding and Trim
Edge banding covers the exposed plywood edges on shelves for a cleaner look. Iron-on edge banding is easiest to apply and comes in several wood grain patterns.
Trim pieces around the front face of your closet system hide any gaps between the unit and walls. Crown molding at the top adds an elegant finishing touch.
Attach trim with finish nails and wood glue. Nail holes nearly disappear when filled with wood filler and painted, leaving a seamless appearance.
Organizing Your New Closet System
A well-designed organization system makes daily life easier and helps you maintain your newly organized space. Strategic planning of what goes where maximizes both function and convenience.
Categorizing Your Items
Group similar items together when arranging your closet. All shirts in one area, pants in another, and accessories in a third location creates an intuitive system.
Place items you use most frequently at eye level and within easy reach. Less-used seasonal items can go on higher shelves or in less convenient spots.
Consider using bins or baskets on shelves to corral small items like scarves, belts, or accessories. These containers prevent clutter while making items easy to find and grab.
Maximizing Vertical Space
Most closets have unused vertical space above the main hanging area. Install shelves all the way to the ceiling to take advantage of this valuable storage real estate.
Store off-season clothing or rarely used items in labeled boxes on the highest shelves. A small step stool keeps these items accessible when needed while freeing up prime space below.
Vertical dividers on shelves help keep stacks of folded clothes neat and organized. These simple additions prevent stacks from toppling over or getting mixed together.
Creating Zones by Activity
Organize your closet by creating zones for different activities or occasions. A work clothes section, casual wear area, and formal attire zone makes getting dressed faster and easier.
Group complete outfits together if you prefer not to mix and match. This approach saves time in the morning and ensures you never forget a key piece of an outfit.
Keep accessories near the clothes you wear them with. Belts near pants, ties near dress shirts, and jewelry near dressy outfits creates a logical flow.
Maintaining Your Wood Closet Organizer
Regular maintenance keeps your closet system looking great and functioning properly for years. Simple care routines prevent problems before they start.
Regular Cleaning
Dust wooden surfaces weekly with a soft cloth or duster. Regular dusting prevents buildup that can scratch the finish when you move items around.
Clean painted surfaces with a slightly damp cloth and mild soap when needed. Avoid harsh chemicals that can damage or dull the finish over time.
Vacuum closet floors and baseboards regularly to prevent dust from settling on lower shelves. This simple habit keeps the entire closet feeling fresh and clean.
Checking for Damage
Inspect shelves periodically for any signs of sagging, especially those holding heavy items. Sagging indicates the shelf needs additional support before it fails completely.
Tighten any loose screws you find during your inspection. Wood naturally expands and contracts with humidity changes, which can gradually loosen fasteners over time.
Look for water damage or stains, particularly in closets with exterior walls. Address any moisture issues immediately to prevent wood rot or mold growth.
Making Adjustments
Reorganize your closet seasonally to rotate clothing and keep frequently-used items most accessible. This practice also gives you a chance to spot any maintenance needs.
Adjust shelf heights as your storage needs change. The flexibility of adjustable shelves lets you adapt your closet to new situations without rebuilding anything.
Add or remove components as needed. Your diy closet system can grow and change with you, accommodating new hobbies, lifestyle changes, or expanded wardrobes.
Avoiding Common DIY Closet Building Mistakes
Learning from others’ mistakes saves you time, money, and frustration. These common errors trip up many first-time closet builders, but you can avoid them completely.
Measurement and Planning Errors
Failing to account for baseboards and crown molding throws off measurements. Measure to the wall surface where your closet will actually sit, not just the floor-to-ceiling height.
Not leaving enough clearance for doors to open and close is another frequent mistake. Make sure shelves do not block the door swing or interfere with the door frame.
Warning: Always verify measurements multiple times before cutting expensive materials. The old carpenter’s rule “measure twice, cut once” exists for a good reason. One wrong cut can waste an entire board and delay your project.
Underestimating material quantities leaves you short at critical moments. Buy at least ten percent more materials than your calculations suggest to cover waste and mistakes.
Structural Mistakes
Using boards that are too thin for the span creates sagging shelves. A 1×12 board should not span more than 36 inches without center support or it will eventually bow under weight.
Failing to attach the unit securely to wall studs creates a dangerous tipping hazard. Always anchor tall furniture to studs, not just drywall, especially in earthquake-prone areas.
Skipping wood glue in joints to save time reduces overall strength significantly. The few seconds it takes to apply glue pays off in a much more rigid, squeak-free closet.
Finishing Mistakes
Painting or staining before final assembly makes touch-ups difficult and creates visible lines at joints. Finish the entire assembled piece for the most uniform appearance.
Applying finish in humid conditions or extreme temperatures affects drying time and final appearance. Work in a climate-controlled space when possible for best results.
Not allowing adequate drying time between coats traps solvents in the finish. These trapped solvents can cause the finish to remain tacky or fail to harden properly even after weeks.
Creative Customization Ideas for Your Closet
Personal touches transform a basic closet organizer into a custom feature perfectly suited to your specific needs. These ideas inspire you to make your closet uniquely yours.
Specialty Storage Solutions
Jewelry drawers with divided compartments keep necklaces from tangling and earrings organized. Line these drawers with felt to protect delicate pieces from scratches.
Pull-out trouser racks save space while keeping pants unwrinkled and easy to see. These racks work especially well in narrow closet spaces where hanging pants would crowd the rod.
Shoe shelves angled slightly backward keep shoes visible while preventing them from falling forward. This simple design detail makes a huge difference in usability and appearance.
Lighting Enhancements
LED strip lights under each shelf create beautiful ambient lighting while making it easy to see dark corners. Battery-operated options install without any electrical work.
Motion-activated closet lights turn on automatically when you open the door. This convenient feature means you never search for items in a dark closet again.
Lighted hanging rods illuminate your clothing while adding a luxury touch. These specialized rods cost more but create a boutique closet feel.
Aesthetic Upgrades
Decorative knobs and pulls on drawers add personality to your closet. Choose hardware that matches your bedroom decor for a cohesive look throughout the space.
Wallpaper or paint on the back wall creates visual interest and makes the closet feel special. Bold patterns work well in closets since you only see them when the door is open.
Glass fronts on some shelves or cabinets show off special items while protecting them from dust. This treatment works beautifully for displaying handbags, shoes, or accessories.
Budget-Friendly Upgrades
Paint existing wire shelving for a fresh new look
Add fabric-covered boxes for hidden storage
Install inexpensive hooks for bags and accessories
Use paint to create a feature wall or accent color
Repurpose vintage crates as unique shelf dividers
High-Impact Additions
Install a full-length mirror on the back of the door
Add a cushioned bench or ottoman for seating
Create a charging station for electronic devices
Install a pull-down ironing board in the closet
Add a fold-out countertop for folding clothes
Maximizing Small Closet Spaces
Small closets present unique challenges but also opportunities for creative solutions. Smart design choices help you fit surprisingly large amounts of storage into compact spaces.
Double-Duty Design Elements
Double hanging rods instantly double your hanging space for shorter items like shirts and pants. This simple addition makes the biggest impact in small closets.
Corner units utilize often-wasted corner space. Angled shelves or lazy susan turntables in corners make items accessible that would otherwise get lost in the back.
Over-door organizers add storage without taking up any closet floor or wall space. These work great for shoes, accessories, or cleaning supplies in very tight quarters.
Vertical Storage Strategies
Floor-to-ceiling shelving makes use of every inch of vertical space. Even high shelves you can barely reach provide valuable storage for seasonal or rarely-used items.
Stackable storage boxes create flexible organization that changes as your needs change. Clear boxes let you see contents without labels, saving time when searching for specific items.
Hanging organizers with multiple pockets drop down from the closet rod. These fabric organizers hold surprising amounts while taking up minimal space.
Slim Profile Solutions
Narrow shelves just six inches deep along side walls hold shoes, folded t-shirts, or accessories. This shallow depth keeps items visible and accessible in tight spaces.
Sliding doors or pocket doors save space compared to traditional swing doors. In very small rooms, eliminating the door swing area can make a significant difference.
Velvet hangers are thinner than plastic or wooden hangers, giving you more hanging capacity per foot of rod. This simple switch can fit several more items in the same space.
Designing Walk-In Closet Features
Walk-in closets offer more space and possibilities for creating a dream dressing room. These larger spaces benefit from thoughtful design that balances storage with style.
Island and Peninsula Units
A center island adds tremendous storage and creates a luxury boutique atmosphere. Islands work best in closets at least eight feet by eight feet, leaving room to walk around all sides.
Drawers in the island keep items organized and dust-free. Use shallow drawers for jewelry and accessories, deeper ones for sweaters or handbags.
The island top provides counter space for folding clothes, laying out outfits, or displaying decorative items. A glass top lets you showcase collectibles or special accessories underneath.
Seating Areas
Built-in benches provide a place to sit while putting on shoes or planning outfits. Add storage under the bench seat for extra functionality in the same footprint.
A small chair or ottoman makes the closet feel more like a dressing room than just storage. This addition elevates the space psychologically and improves the getting-ready experience.
Window seats in walk-in closets with windows create a bright, cheerful space. These built-in seats can include storage drawers underneath for maximum efficiency.
Specialty Zones
Designate specific areas for different purposes to create an efficient workflow. A grooming station with mirror and counter keeps all beauty products in one convenient location.
Laundry hampers built into the closet design keep dirty clothes out of sight. Separate hampers for lights, darks, and delicates make laundry day easier.
A full-length three-way mirror helps you see outfits from all angles. Position the mirror to catch natural light if possible for the most accurate color representation.
Understanding Project Costs and Budget Planning
Knowing what to expect cost-wise helps you budget accurately and make informed decisions about materials and design. This section breaks down typical expenses for diy closet projects.
Material Cost Factors
Wood type significantly impacts your total material cost. Pine costs much less than oak or maple but still delivers good results when properly finished.
Plywood quality varies from basic utility grade to furniture-grade with minimal defects. Higher grades cost more but require less filling and sanding before finishing.
Material Category
Budget Option
Mid-Range Option
Premium Option
Wood for shelving
Pine boards
Birch plywood
Oak or maple hardwood
Finish
Basic latex paint
Quality wood stain
Professional lacquer
Hardware
Basic chrome fittings
Brushed nickel
Solid brass or custom
Closet rods
Chrome plated steel
Solid wood dowels
Polished brass or LED
Accessories
Basic shelf dividers
Drawer inserts
Custom features
Hardware like drawer slides, hinges, and shelf pins ranges from basic to high-end. Mid-range hardware offers the best balance of quality and cost for most projects.
Tool Investment Considerations
If you need to buy tools for this project, consider their value for future projects too. A quality circular saw serves you well for years of different home improvement work.
Renting expensive tools you will only use once makes financial sense. Many home improvement stores rent tools by the day at reasonable rates.
Borrowing tools from friends or family reduces your costs to just materials. Make sure you understand how to operate borrowed tools safely before starting work.
Time Investment Reality
A basic closet organizer for a standard five-foot closet typically takes a weekend to complete. More complex designs with many features may require several weekends of work.
Your skill level affects how long the project takes. First-time builders should budget extra time for learning and correcting mistakes along the way.
Working in short sessions when you have energy produces better results than marathon building sessions when tired. Mistakes happen more frequently when you are rushed or fatigued.
Exploring Alternative Materials for Closet Organizers
While solid wood and plywood are traditional choices, other materials offer unique benefits. Understanding your options helps you choose the best material for your specific situation.
Melamine and Laminate Options
Melamine-coated particleboard costs less than solid wood and needs no painting or staining. The smooth surface cleans easily and resists scratches better than paint.
Pre-finished melamine comes in many colors and wood-grain patterns. White melamine creates a clean, modern look popular in contemporary closet designs.
The main drawback of particleboard is lower strength compared to solid wood or plywood. Reinforce long spans with additional support to prevent sagging over time.
Wire Shelving Systems
Wire shelving allows air circulation that prevents musty odors in closets. This feature makes wire particularly good for storing shoes or athletic wear.
Ventilated wire prevents dust buildup on shelves since air flows through rather than settling on a solid surface. This characteristic means less frequent cleaning.
Wire shelving installs quickly without complicated cuts or measurements. These systems use adjustable clips that let you reconfigure shelf heights easily whenever needed.
Hybrid Approaches
Combining materials often produces the best results at moderate cost. Use wire shelving for shoes and accessories where ventilation helps, and wood shelves for folded clothes that need solid support.
Metal frame systems with wood shelves offer industrial style and excellent strength. The metal supports span longer distances without sagging compared to all-wood construction.
Mixing open shelving with closed cabinet sections adds visual interest. Closed cabinets hide less-attractive items while open shelves display decorative storage boxes or folded linens.
Troubleshooting Common Installation Problems
Even careful planning cannot prevent every challenge. Knowing how to address common issues keeps your project moving forward when unexpected problems arise.
Dealing with Uneven Walls
Few walls are perfectly straight or plumb. Measure at multiple points along the wall to identify high and low spots before installation.
Scribe the back edge of side panels to match wall irregularities. This technique involves holding the panel against the wall and marking where it touches, then cutting along that line.
Shim behind the unit to bring it plumb if walls lean. Small wooden shims fill gaps and let you attach securely to studs even when walls are not perfectly vertical.
Fixing Measurement Mistakes
If you cut a shelf too short, add decorative trim to both ends to extend the length. This fix can turn a mistake into an attractive design feature.
Pieces cut too long can usually be trimmed down unless the cut was severely oversized. Measure carefully before making correction cuts to avoid compounding the error.
Cover small gaps with quarter-round trim or caulk. These minor corrections blend in well, especially after painting or staining matches the finish.
Addressing Sagging Shelves
Add a center support bracket if a shelf sags under weight. This quick fix prevents the problem from worsening and damaging the shelf permanently.
Replace undersized shelves with thicker material rated for the span and load. Sometimes the only real solution is using appropriately sized components from the start.
Reduce the load on sagging shelves by redistributing heavy items to shorter spans or lower shelves. This approach works temporarily while you plan a permanent fix.
Master Every Step With Professional Blueprints
Stop worrying about mistakes and wasted materials. Get access to detailed plans that show you exactly how professional carpenters build closet systems that last for decades. Complete cutting lists, assembly diagrams, and expert troubleshooting guidance included.
Rotating your closet contents with the seasons keeps frequently-used items accessible while maximizing limited space. This practice also gives you regular opportunities to declutter and reorganize.
Creating a Rotation System
Store off-season clothes on high shelves or in bins under beds. This approach keeps current season items at eye level where you can easily see and access them daily.
Label storage containers clearly with contents and season. This simple step saves time when the seasons change and you need to swap things around.
Clean items before storing them for the season. Dirt and stains set over time, making them much harder to remove when you retrieve the items months later.
Protecting Stored Items
Cedar blocks or lavender sachets repel moths and keep stored clothes fresh. Place these natural deterrents in storage bins and on closet shelves throughout the space.
Vacuum-sealed bags compress bulky items like winter coats and sweaters. This compression creates more storage space, though items may wrinkle and need freshening when removed.
Breathable cotton garment bags protect special items without trapping moisture. Avoid plastic bags for long-term storage as they can trap moisture that leads to mildew.
Transition Period Planning
During seasonal transitions, keep a selection from both seasons accessible. Unpredictable weather means you might need both a sweater and shorts within the same week.
Set aside one day each season to complete the rotation. This dedicated time ensures the task gets done rather than constantly postponing it.
Use the seasonal rotation as a natural time to declutter. If you did not wear something all season, consider whether you really need to keep it for another year.
Effective Closet Lighting Solutions
Good lighting transforms a closet from a dark storage space into a functional dressing area. Proper illumination helps you find items quickly and see colors accurately when choosing outfits.
Types of Closet Lighting
Overhead lights provide general illumination but can cast shadows. A single ceiling fixture works for small closets but larger spaces need multiple light sources.
LED strip lights installed under shelves eliminate shadows and highlight specific areas. These energy-efficient lights produce minimal heat, making them safe near clothing and wood.
Puck lights mounted inside the closet provide focused task lighting. These small fixtures work well for lighting specific areas like jewelry drawers or tie racks.
Installation Considerations
Battery-operated lights install without electrical work, making them ideal for renters or DIY-friendly options. Modern rechargeable batteries last months between charges with LED bulbs.
Hardwired lighting requires running electrical cable and may need a permit. Hire a licensed electrician for this work unless you have electrical experience and local codes allow homeowner installation.
Smart lighting systems let you control closet lights from your phone or with voice commands. These systems cost more initially but add convenience and can integrate with whole-home automation.
Choosing the Right Color Temperature
Warm white light around 2700K creates a cozy atmosphere but may distort colors slightly. This temperature works well for closets in bedrooms where you want a relaxing environment.
Daylight bulbs around 5000K show colors most accurately, helping you coordinate outfits. This cooler temperature works best in walk-in closets used as dressing rooms.
Adjustable color temperature lights let you switch between warm and cool white. This flexibility accommodates different tasks and times of day in multipurpose closet spaces.
Adding Accessibility Features to Your Closet
Designing for accessibility ensures everyone can use the closet comfortably, regardless of age or mobility. These thoughtful features add convenience for all users while being essential for some.
Lower Hanging Heights
Standard closet rods at 66 inches work for standing adults but pose challenges for wheelchair users or children. Adding a lower rod at 48 inches makes hanging items accessible for everyone.
Pull-down closet rods bring high hanging areas within reach when needed. These specialty hardware pieces install like standard rods but include a mechanism to lower them for access.
Side-mounted rods allow wheelchair users to approach parallel rather than head-on. This configuration makes hanging and retrieving clothes much easier from a seated position.
Reachable Shelf Heights
Place frequently-used items on shelves between 15 and 48 inches high. This range stays accessible for most people without reaching or bending excessively.
Pull-out shelves bring items forward for easy viewing and access. This feature particularly helps people with limited mobility who cannot reach into deep cabinet spaces.
Lazy susan turntables in corners make back areas accessible with a simple spin. These rotating platforms prevent items from getting lost in hard-to-reach corner spaces.
Visual Accessibility
High contrast between shelves and walls helps people with low vision navigate the space. Light-colored shelves against dark walls or vice versa create clear visual boundaries.
Adequate lighting becomes even more critical for accessibility. Bright, even illumination without harsh shadows makes finding items easier for everyone, especially older adults.
Clear labeling with large text and symbols helps users remember where things belong. This organization method assists people with memory challenges or cognitive differences.
Making Environmentally Friendly Material Choices
Building your closet with sustainable materials reduces environmental impact while often improving indoor air quality. Many eco-friendly options perform as well or better than conventional choices.
Sustainable Wood Sources
FSC-certified wood comes from responsibly managed forests that maintain biodiversity and support local communities. Look for the FSC label when purchasing lumber or plywood.
Reclaimed wood from old buildings or barns adds character while reducing demand for newly harvested timber. This material often features unique grain patterns and weathering not found in new wood.
Bamboo grows rapidly and regenerates quickly, making it a renewable resource. Bamboo plywood offers strength comparable to hardwood with less environmental impact.
Low-VOC Finishes
Traditional paints and stains release volatile organic compounds that can affect indoor air quality. Low-VOC or zero-VOC products minimize these emissions while delivering excellent results.
Natural oil finishes like linseed or tung oil protect wood without synthetic chemicals. These traditional finishes require more coats but create beautiful, durable surfaces.
Water-based polyurethane emits fewer fumes than oil-based versions during application. Modern formulations perform nearly as well as solvent-based products with much less odor.
Eco-Friendly Hardware
Choose hardware made from recycled metals when available. Many manufacturers now offer closet rods, brackets, and screws made partially or entirely from recycled materials.
Avoid chrome plating, which involves toxic chemicals in the finishing process. Brushed stainless steel, powder-coated steel, or solid brass offer attractive alternatives with less environmental impact.
Buy quality hardware built to last rather than cheap options you will need to replace. Durability reduces waste and environmental impact over the life of your closet system.
Final Thoughts on Building Your DIY Closet Organizer Wood System
Creating a custom closet organizer transforms both your space and your daily routine. The satisfaction of building something with your own hands adds value beyond the money saved compared to professional installation.
This project builds valuable skills you can apply to future home improvement work. The techniques you learned here translate to building shelving for garages, offices, or other storage needs throughout your home.
Take pride in your completed diy closet project. You created a functional, attractive solution perfectly tailored to your specific needs and space constraints.
Remember that your closet can evolve as your needs change. The modular nature of wood construction lets you add, remove, or reconfigure components as your wardrobe or lifestyle changes over time.
Share your success with others who might benefit from building their own closet systems. The knowledge you gained through this project can help friends and family tackle similar challenges in their homes.
Maintain your new closet system with regular cleaning and occasional tightening of hardware. Proper care ensures your custom creation serves you well for many years to come.
Start Building Your Dream Closet Today
Ready to transform your closet from chaotic to organized? Get instant access to professional woodworking plans, detailed cutting diagrams, and expert assembly instructions. Stop searching for scattered information and get everything you need in one comprehensive guide designed for DIY builders at any skill level.
Building a diy closet organizer wood system represents an achievable goal for any homeowner willing to invest some time and effort. The skills required are basic woodworking techniques that anyone can learn and master with practice.
Your investment in tools and materials pays dividends through increased home value and improved daily function. An organized closet makes getting ready faster and reduces stress every single day you use it.
The sense of accomplishment from completing this project motivates you to tackle other home improvements. Each successful project builds your confidence and expands your capabilities for future work.
Valentine’s Day presents the perfect opportunity to celebrate the special connection you share with your loved one. Finding that perfect gift that speaks to your unique relationship isn’t just about the price tag—it’s about capturing the essence of your bond through a thoughtful gesture. Whether you’re celebrating your first Valentine’s together or your twentieth, the…
Finding the right healthy dinner recipes for weight losing can transform your journey. Many people struggle because they believe weight loss means bland food and constant hunger. That’s simply not true.This Website contains affiliate links. That means I may earn a small commission if you purchase through my links, at no extra cost to you….
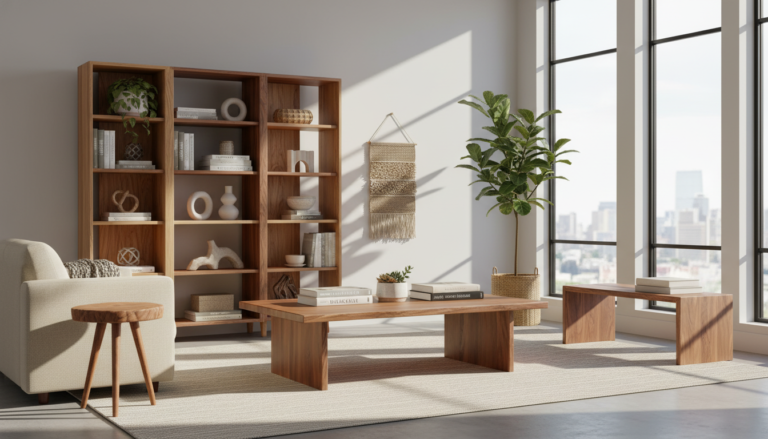
This Website contains affiliate links. That means I may earn a small commission if you purchase through my links, at no extra cost to you. Creating your own woodworking furniture brings unmatched satisfaction. Each piece tells a story of craftsmanship and personal style. Whether you dream of building a rustic dining table or a sleek…
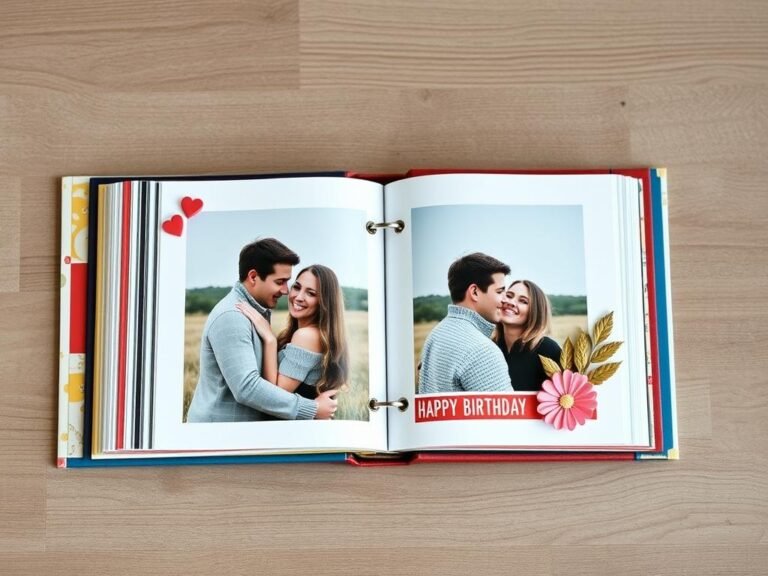
Finding the perfect birthday gift can feel like solving a puzzle. You want something thoughtful that shows you care, but also practical enough that it won’t collect dust. Whether you’re shopping for a best friend, family member, or that person who “has everything,” this curated guide brings together the most unique, popular, and personalized birthday…
Want to give your boyfriend a birthday gift that feels personal and thoughtful without spending hours on complicated crafts? You’re in the right place! These DIY birthday gifts for boyfriend options require minimal effort but deliver maximum impact. The secret is starting with ready-made items that you can easily personalize to create something that looks…
Celebrating six months together marks a special milestone in your relationship journey. This half-year anniversary deserves recognition with a thoughtful gift that captures the memories you’ve created and the love you share. Whether you’re dating or newly married, finding the perfect 6 month anniversary gift ideas can show your partner just how much they mean…