Build Your Own Furniture: Transform Your Home with Custom Creations
Creating your own furniture opens a world of possibilities for your home. You gain complete control over design, size, and finish. The satisfaction of completing a piece you built yourself surpasses anything you can purchase from a store.
This Website contains affiliate links. That means I may earn a small commission if you purchase through my links, at no extra cost to you.
Many people believe furniture building requires years of carpentry experience. That assumption stops countless homeowners from exploring this rewarding hobby. The reality is far more encouraging.
Modern techniques and accessible plans make furniture construction achievable for beginners. You need basic tools, quality materials, and clear instructions. The process becomes straightforward when you follow proven methods.
Why Building Your Own Furniture Makes Sense

Custom furniture offers advantages that store-bought pieces cannot match. Your space has unique dimensions and style requirements. Mass-produced items rarely fit perfectly.
Cost savings represent a significant benefit. Quality furniture from retailers carries substantial markups. Building furniture yourself eliminates middleman expenses. You pay only for materials and your time.
Financial Benefits
A custom coffee table from a furniture store costs between eight hundred and two thousand dollars. Building the same piece requires materials worth one hundred to three hundred dollars. The savings multiply across multiple projects.
Your investment in tools pays for itself quickly. Basic equipment serves you for years across countless projects. Each piece you build increases your return on investment.

Design Freedom and Customization

Store selections limit your options to current inventory. Your vision might not match available products. Building furniture removes these constraints.
You choose every detail. Wood type affects both appearance and durability. Finish options range from natural oils to vibrant stains. Hardware selection adds personalized touches. Your furniture reflects your taste completely.
Size customization solves common space challenges. Standard tables might overwhelm small dining rooms. Pre-made shelves rarely fit alcoves perfectly. Custom dimensions ensure ideal proportions for your space.
Ready to Create Your Perfect Furniture?
Access comprehensive plans designed for beginners. Save thousands while building exactly what you need. Start with simple projects and advance at your own pace.
Essential Materials for Building Furniture

Material selection determines your project outcome. Wood remains the most popular choice for furniture construction. Different wood types offer distinct characteristics.
Understanding Wood Types
Hardwoods provide superior strength and longevity. Oak delivers exceptional durability for tables and chairs. Maple offers a smooth finish ideal for bedroom furniture. Walnut provides rich color without staining.
Softwoods like pine cost less and work easily. They suit beginner projects perfectly. Pine accepts paint well and handles basic joinery. Cedar resists moisture, making it excellent for outdoor pieces.


Solid Wood
Premium choice for heirloom-quality furniture. Requires more skill but delivers unmatched beauty. Best for visible surfaces and structural components.

Plywood
Engineered wood offers stability and affordability. Resists warping better than solid wood. Perfect for cabinet backs and drawer bottoms.

MDF and Particleboard
Budget-friendly options for painted furniture. Smooth surface accepts paint excellently. Not suitable for structural applications or moisture exposure.
Hardware and Fasteners

Quality hardware ensures furniture longevity. Screws provide stronger connections than nails for most applications. Wood screws grip better than drywall screws. Choose appropriate length to penetrate at least one inch into the receiving piece.
Wood glue strengthens every joint. Modern adhesives create bonds stronger than the wood itself. Apply glue to both surfaces and clamp until dry. This step transforms weak joints into permanent connections.
Brackets and corner braces add stability to larger pieces. Metal reinforcements prevent wobbling in tables and chairs. Pocket hole screws create invisible joints for professional appearance.
Material Tip: Purchase wood with moisture content below fifteen percent. Higher moisture causes warping after construction. Most home improvement stores stock properly dried lumber. Always inspect boards for straightness before buying.
Tools You Need to Build Furniture

Starting your furniture building journey requires basic equipment. You can complete many projects with minimal tools. Advanced equipment comes later as your skills develop.
Essential Power Tools

Circular Saw
This versatile tool handles most cutting tasks. It breaks down large boards and makes straight cuts. A guide ensures accuracy. Entry-level models cost around sixty dollars.

Drill and Driver
Every furniture project requires drilling holes and driving screws. A cordless drill offers convenience and sufficient power. Invest in quality bits. They last longer and work more efficiently.

Hand Tools for Precision
Power tools speed up work, but hand tools provide control. A quality square ensures perpendicular cuts and assembly. Measuring tape accuracy determines project success. Mark measurements twice to avoid costly mistakes.
Clamps hold pieces during glue drying and assembly. You cannot own too many clamps. Start with four to six bar clamps in various sizes. They maintain pressure while adhesive sets.
- Combination square for checking angles and marking lines
- Tape measure with clear markings and sturdy case
- Set of chisels for fine detail work and joint fitting
- Hand plane for smoothing surfaces and adjusting fit
- Level for ensuring furniture sits properly
- Safety glasses and hearing protection for every project

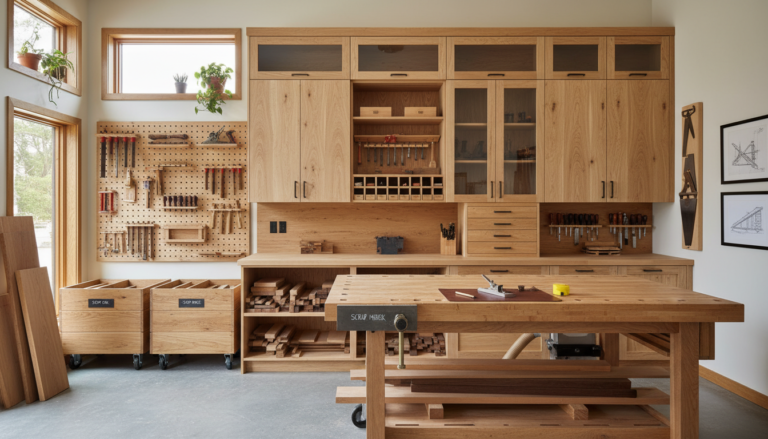
Setting Up Your Workspace
A dedicated work area improves project quality. Garages work well for furniture building. Basements offer year-round climate control. Even small spaces function with proper organization.
Good lighting prevents mistakes and reduces eye strain. Dust collection keeps your space clean and protects your lungs. A simple shop vacuum manages most cleanup needs. Your workspace should accommodate the largest piece you plan to build.
Perfect Projects for Beginners

Starting with appropriate projects builds confidence and skills. Simple designs teach fundamental techniques. Success on early projects motivates you to tackle more complex pieces.
Coffee Table Construction
A coffee table represents an ideal first project. The design uses basic joinery. Dimensions remain manageable. Results provide immediate value to your living room.

Standard coffee table dimensions measure forty-eight inches long by twenty-four inches wide. Height ranges from sixteen to eighteen inches. These proportions suit most living spaces.
Construction starts with the tabletop. Edge-glue boards to achieve desired width. After drying, sand the surface smooth. Build a simple apron frame to support the top. Attach legs at each corner using pocket screws or corner brackets.
Materials Required
- Four pine boards for tabletop (1×6 x 8 feet)
- Four boards for apron frame (1×4 x 8 feet)
- Four table legs (or lumber to make them)
- Wood glue and screws
- Sandpaper in various grits
- Finish of your choice

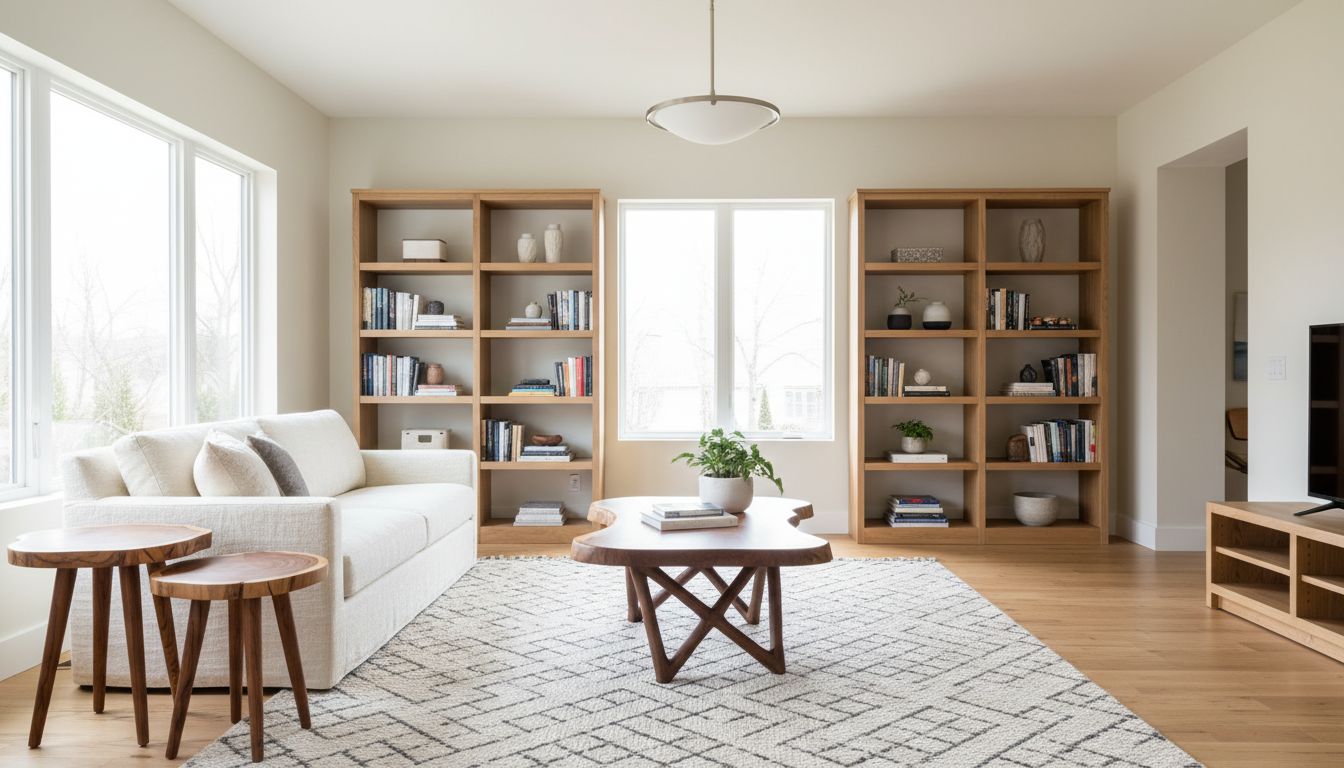
Simple Bookshelf Design

Bookshelves offer both function and display space. Basic designs require only straight cuts and simple assembly. You learn important concepts like shelf span and load distribution.
A standard bookshelf stands seventy-two inches tall with five shelves. Each shelf spans thirty-six inches wide and twelve inches deep. These dimensions accommodate most book sizes while maintaining structural integrity.
Use three-quarter inch plywood for shelves and sides. Cut dado grooves for shelf supports or use shelf pins with drilled holes. The back panel prevents racking and keeps the unit square. Attach a solid wood face frame for a finished appearance.

Nightstand with Storage
Nightstands introduce drawer construction techniques. The compact size makes them less intimidating than dressers. You gain experience with drawer slides and hardware installation.
Typical nightstand dimensions measure twenty-four inches tall, eighteen inches wide, and sixteen inches deep. This size fits beside most beds without overwhelming the space. Single drawer models simplify construction while providing essential storage.

Entryway Bench
Perfect starter project teaching basic frame construction. Requires minimal materials. Provides practical seating and storage. Builds confidence through quick completion.

Floating Shelves
Minimalist design requires precision cutting. Teaches proper wall mounting techniques. Creates attractive display space. Excellent practice for measuring and leveling.

Side Tables
Similar to coffee tables but smaller scale. Less material investment reduces project risk. Teaches proportion and finishing. Creates useful accent pieces.
Start Building Professional-Quality Furniture
Get detailed plans for these projects and dozens more. Step-by-step instructions eliminate guesswork. Join thousands who transformed their homes with custom furniture.
Essential Techniques for Success

Mastering key techniques separates amateur work from professional results. Focus on fundamentals before attempting complex designs. Proper methods ensure structural integrity and attractive appearance.
Accurate Measuring and Cutting
Precision determines project quality. Measure each piece twice before cutting. Mark cut lines clearly with a sharp pencil. Use a square to ensure perpendicular lines.

Account for saw blade width when measuring. The blade removes material equal to its thickness. This kerf affects final dimensions. Always cut on the waste side of your line. Sand to your mark if needed.
Joinery Basics
Joints connect pieces permanently. Different joint types suit specific applications. Butt joints offer simplicity but limited strength. Pocket holes create strong invisible connections. Dado joints excel for shelf installations.

Pocket Hole Technique
A pocket hole jig guides your drill at the correct angle. The screw enters from the back surface. This creates strong joints without visible fasteners. The method suits face frames, table aprons, and panel assembly.
Clamp pieces firmly during drilling. Apply glue before driving screws. The combination creates joints stronger than the surrounding wood.

Proper Finishing Process
Finishing protects your furniture and enhances appearance. Surface preparation determines finish quality. Sand progressively through finer grits. Start with eighty-grit for rough surfaces. Progress through one hundred twenty, one hundred fifty, and finish with two hundred twenty grit.
Remove all dust before applying finish. A tack cloth picks up fine particles. Apply finish in thin coats rather than one thick layer. Multiple thin coats level better and dry faster.
- Oil finishes penetrate wood and enhance natural grain
- Polyurethane provides durable protective coating
- Wax creates soft luster on painted or stained pieces
- Stain changes wood color while showing grain pattern
- Paint offers unlimited color options and hides imperfections
Pro Tip: Test finish on scrap wood from your project. Appearance varies between wood species. The test reveals actual color and sheen. Adjust your approach based on results before committing to your furniture piece.
Avoiding Common Furniture Building Mistakes

Learning from others’ mistakes saves time and materials. Beginners typically encounter similar challenges. Awareness prevents frustration and wasted effort.
Planning and Preparation Errors
Insufficient planning causes most project failures. Create detailed cut lists before purchasing materials. Calculate exact quantities to avoid shortages. Sketch your design with dimensions marked clearly.
Many beginners skip the dry assembly step. Fitting pieces together without glue reveals problems early. You can adjust and correct issues easily at this stage. Once glue dries, fixes become difficult or impossible.

Smart Building Practices
- Dry fit all pieces before gluing
- Use story sticks for consistent measurements
- Label pieces during cutting process
- Keep workspace organized and clean
- Follow plans exactly on first projects
- Allow adequate drying time for glue
Practices to Avoid
- Starting without complete materials list
- Rushing through sanding and preparation
- Ignoring wood grain direction
- Over-tightening clamps causing damage
- Applying thick finish coats that drip
- Skipping safety equipment to save time
Material Selection Mistakes

Cheap materials compromise your finished furniture. Warped boards create assembly difficulties. Knots weaken structural components. Inspect every board before purchase. Sight down the length to check for twists and bows.
Using inappropriate wood types for specific projects leads to failures. Softwoods lack strength for chair legs. Moisture-sensitive materials fail in bathroom furniture. Match material properties to your project requirements.
Assembly and Finishing Issues
Working too quickly during assembly causes mistakes. Glue sets rapidly once applied. Organize pieces in assembly order. Have all clamps ready before gluing starts. Once you begin, work efficiently but deliberately.
Inadequate sanding shows through any finish. Scratches and mill marks become more visible under stain or clear coat. Invest time in surface preparation. Your effort pays dividends in final appearance.
Advancing Your Furniture Building Skills

After completing several basic projects, new challenges await. Intermediate furniture introduces advanced techniques. Your skills expand with each successive build.
Dining Tables and Chairs
Dining furniture demands strength and stability. Tables support significant weight during use. Chair construction requires precise angles and robust joints.

Standard dining table height measures thirty inches from floor to top surface. Allow twenty-four inches of table length per person. Width should accommodate place settings plus serving dishes. A sixty-inch table seats six comfortably.
Table construction begins with a sturdy base. Apron rails connect legs and support the tabletop. Consider expansion slides if you need occasional extra seating. Attach the top with fasteners allowing wood movement across the grain.
Bedroom Furniture Projects

Bedroom pieces let you practice consistency. Matching nightstands develop your ability to replicate dimensions. A dresser combines drawer construction with cabinet making.
Platform bed frames offer simpler construction than traditional beds. The design eliminates box springs. Build a strong rectangular frame. Add slats to support the mattress. Incorporate storage drawers beneath for functionality.

Dresser Construction
Multiple drawers teach efficiency in repetitive tasks. Install quality drawer slides for smooth operation. Consistent drawer spacing creates professional appearance. Solid construction withstands daily use.

Wardrobe Building
Large case pieces require advanced planning. Consider wood movement in wide panels. Hanging rods need adequate support. Door alignment demands precision. Results provide significant storage space.

Custom Headboards
Headboards offer design creativity. Incorporate shelving for books and items. Add lighting for functionality. Upholstered panels increase comfort. Installation methods vary by design.
Living Room Furniture
Entertainment centers and bookcases serve as room focal points. These larger pieces showcase your developing skills. Careful design ensures they enhance rather than dominate your space.

TV stands must accommodate specific equipment dimensions. Measure your television and components before designing. Include wire management solutions. Ventilation prevents electronic overheating. Adjustable shelves adapt to changing needs.
Built-in appearance adds value to homes. Floor-to-ceiling bookcases maximize storage. Custom sizing fills available wall space perfectly. Face frames hide plywood edges for finished appearance. Crown molding integrates units with room architecture.
Build Furniture Your Family Will Treasure for Generations
Stop paying premium prices for ordinary furniture. Access hundreds of detailed plans for every room. Professional techniques simplified for home builders. Money-back guarantee ensures your satisfaction.
Creating an Efficient Workshop Space

Your workspace directly impacts project quality. Organization improves efficiency and safety. Even limited space becomes productive with proper setup.
Workshop Layout Considerations
Position your workbench near electrical outlets. Central placement allows movement around projects. Maintain clear floor space equal to your largest project dimension. This room lets you maneuver materials safely.

Storage keeps tools accessible yet organized. Wall-mounted systems maximize floor space. Pegboards hold frequently used hand tools. Cabinets store power tools and protect them from dust. Label storage locations for quick identification.
Essential Workshop Infrastructure
Adequate lighting prevents eye strain and mistakes. Install overhead fixtures plus task lighting at work surfaces. Natural light helps judge finish color accurately. Supplement with daylight-spectrum bulbs.
Dust management protects your health and keeps machinery running smoothly. Connect tools to shop vacuums when possible. Sweep regularly to prevent sawdust accumulation. Wear dust masks during sanding operations.
- Sturdy workbench with vise for holding pieces
- Mobile bases for tools needing repositioning
- Extension cords rated for power tool amperage
- Fire extinguisher accessible near work area
- First aid kit for minor injury treatment
- Material storage rack preventing wood warping

Your Furniture Building Journey Starts Now

Building your own furniture transforms houses into personalized homes. You create exactly what you envision. Each piece reflects your style and meets your specific needs.
The journey begins with a single project. Choose something simple that excites you. Follow proven plans and techniques. Your confidence grows with each completed piece.
Financial savings accumulate across multiple projects. The initial tool investment returns value many times over. You build furniture worth thousands for hundreds in materials. These savings fund future projects or other priorities.
Skills develop progressively through practice. Early projects teach fundamental concepts. Later builds introduce advanced techniques. Your abilities expand naturally as you complete more furniture.
The satisfaction of creating something permanent with your hands provides rewards beyond money. Guests admire your craftsmanship. Family members cherish pieces you built. Your furniture becomes part of home memories.
Resources and guidance make success accessible to everyone. Detailed plans eliminate guesswork. Step-by-step instructions anticipate common questions. Support communities share knowledge and encouragement.
Start your furniture building adventure today. Your first project awaits. The skills you gain serve you for life. Your home deserves furniture built with care and customized perfectly.
Transform Your Home with Custom Furniture You Build Yourself
Access complete furniture building system designed for beginners and experienced builders. Detailed plans for every room. Video demonstrations clarify complex techniques. Join successful furniture builders creating beautiful pieces. Save thousands while building exactly what you want. Start today with full money-back guarantee.