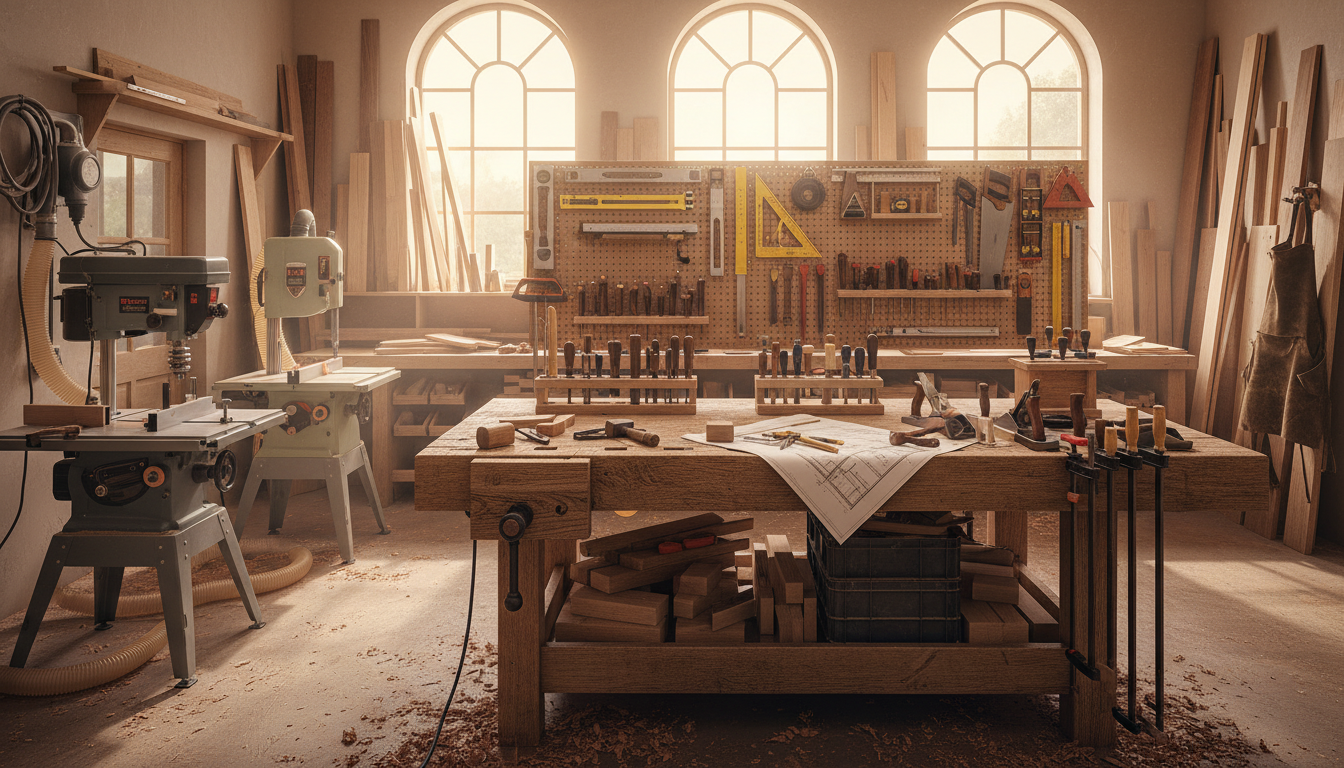
Building your own table transforms your living space while saving hundreds of dollars. Custom furniture lets you choose exact dimensions, wood species, and finish colors. Many beginners worry about complex joinery or expensive mistakes. The right diy table plans eliminate guesswork and material waste.
This Website contains affiliate links. That means I may earn a small commission if you purchase through my links, at no extra cost to you.
This guide covers everything from selecting lumber to applying the final coat of stain. You’ll learn essential techniques that professional woodworkers use daily. Whether you need a dining table, coffee table, or side table, these principles apply universally.
Most DIY furniture projects fail because of poor planning, not lack of skill. Understanding wood movement, proper joinery, and finishing techniques makes the difference. Starting with comprehensive plans saves time and frustration throughout the entire building process.
Understanding Table Construction Basics
Every table consists of three main components: the top, base, and legs. The top provides the functional surface. The base connects and stabilizes the structure. Legs support the entire weight and determine overall height.
Wood selection impacts both appearance and durability. Pine offers affordability and easy workability for beginners. Oak provides classic beauty with superior strength. Maple delivers smooth grain patterns and exceptional hardness for high-use surfaces.
Essential Joinery Methods for Tables
Pocket hole joinery dominates modern DIY table construction. This technique uses angled screws driven through pocket holes drilled into one board. The pocket hole connects into the edge of another piece, creating strong invisible joints.
Traditional mortise and tenon joints offer maximum strength for heirloom furniture. The tenon extends from one piece and fits snugly into the mortise cut in another. This method requires more skill but creates incredibly durable connections.
Pocket Hole Advantages
Fast assembly with minimal clamps required
No visible fasteners on finished surfaces
Beginner-friendly with basic jig system
Strong enough for most furniture applications
Traditional Joinery Benefits
Superior long-term durability and strength
No metal fasteners to corrode over time
Authentic craftsman appearance and feel
Better for antique or formal furniture styles
Selecting the Right Lumber
Lumber comes in rough-sawn or pre-surfaced options. Rough-sawn boards cost less but require planing and jointing. Pre-surfaced lumber saves time for builders without thickness planers.
Board dimensions use nominal sizing that differs from actual measurements. A 2×4 actually measures 1.5 inches by 3.5 inches after milling. Plan your diy table plans accounting for these standard reductions in size.
Moisture content affects wood stability significantly. Kiln-dried lumber contains 6-8% moisture, ideal for indoor furniture. Air-dried wood may warp or crack as it continues drying in your climate-controlled home.
Ready to Build Professional-Quality Tables?
Access comprehensive woodworking plans with detailed cut lists, assembly diagrams, and expert techniques. Stop wasting materials on trial and error.
Building tables requires fewer tools than most people expect. A circular saw or table saw handles most cutting tasks. The table saw delivers more accurate cuts for joinery and repeated measurements.
A quality drill drives pocket hole screws and creates pilot holes. Invest in both drilling and driving bits. Combination drill-driver kits provide versatility for various fastening applications throughout your project.
Must-Have Hardware and Fasteners
Pocket hole screws come in different lengths for various material thicknesses. Use coarse-thread screws for softwoods like pine. Fine-thread pocket hole screws work better with hardwoods such as oak or maple.
Pocket Hole Essentials
Pocket hole jig system
Stepped drill bit
Driver bit with stop collar
Assorted pocket hole screws
Assembly Materials
Wood glue for all joints
Wood screws various sizes
Corner brackets for base
Furniture levelers or glides
Finishing Supplies
Multiple grits of sandpaper
Stain in desired color
Polyurethane or finishing oil
Application brushes and rags
Wood glue strengthens every joint significantly. Apply glue to both surfaces before driving screws. Excess glue squeezes out during clamping and wipes away easily with a damp cloth.
Measuring and Marking Tools
Accurate measurements prevent costly mistakes and material waste. A quality tape measure reaches across full sheet goods. A combination square checks both 90-degree and 45-degree angles for miter cuts.
Mark cut lines with a sharp pencil on the waste side of measurements. This technique ensures you cut away excess material while preserving exact dimensions. Double-check all measurements before making cuts.
A speed square helps mark straight cut lines across board width. This tool also guides circular saw cuts for perfectly square crosscuts. The built-in degree markings assist with angled cuts for table legs or aprons.
Step-by-Step Table Building Process
Start every table project by cutting all pieces to size from your lumber. Group similar cuts together for efficiency. Label each piece with its location to avoid confusion during assembly.
Building the Table Base
The table base consists of aprons connecting the legs. Cut aprons to length accounting for leg thickness at each corner. The aprons create a rectangular frame that supports the table top.
Drill pocket holes at both ends of each apron piece. Position holes on the inside face where they won’t be visible. Space pocket holes approximately 2 inches from ends and center one hole if using three per joint.
Pro Tip: Dry-fit all base pieces before applying glue. This practice confirms measurements and reveals any cutting errors while fixes remain easy.
Apply wood glue to joining surfaces before driving pocket hole screws. The glue provides long-term strength while screws hold pieces during curing. Wipe excess glue immediately with a damp cloth before it dries.
Measure diagonally across the assembled base from corner to corner. Equal diagonal measurements confirm the frame is square. Adjust slightly before glue sets if measurements differ.
Attaching Table Legs
Table leg attachment determines overall stability and longevity. Position each leg flush with the outside corner of the base frame. This alignment creates maximum support and clean corner lines.
Drill pocket holes into aprons positioned to connect into leg material. Angle the pocket holes toward the top of each leg. Drive pocket hole screws through aprons into the leg, pulling the joint tight.
Add corner brackets for additional support on larger dining table projects. Install brackets on the inside corners between legs and aprons. These metal reinforcements prevent racking and increase overall rigidity.
Constructing the Table Top
A solid wood table top requires edge-gluing multiple boards together. Arrange boards with alternating grain patterns for stability. This technique minimizes cupping and warping as wood responds to humidity changes.
Apply wood glue along the edge of each board in thin, even beads. Press boards together and secure with bar clamps every 12-18 inches. Alternate clamp positions above and below the glued panel to prevent bowing.
Allow glue to cure for at least 4 hours before removing clamps. Overnight curing provides maximum bond strength. Scrape off dried glue beads with a cabinet scraper before sanding.
Sand the top surface progressively through grits from 80 to 220. Coarse sandpaper removes glue residue and levels uneven board joints. Finer grits create smooth surfaces ready for stain application.
Securing Top to Base
Attach the table top using methods that allow for wood movement. Pocket holes work well for small tables under 36 inches wide. Drill pocket holes through the inside edge of aprons angled upward into the table top.
Figure-eight fasteners provide better solutions for larger dining table tops. These metal clips install in shallow mortises cut into apron top edges. One side screws to the apron while the other side screws to the underside of the top.
Wood expands and contracts across the grain with seasonal humidity changes. Rigid attachments can crack boards or pull joints apart over time. Figure-eight fasteners rotate slightly, accommodating this natural movement.
Space fasteners every 8-10 inches along each apron. This spacing provides adequate support while allowing independent movement. Position fasteners so the screw holes align with solid wood in both the apron and top.
Common Mistakes and How to Avoid Them
Most beginning woodworkers rush through the planning phase. Inadequate planning leads to incorrect measurements, wasted materials, and frustration. Spend time reviewing your diy table plans before making the first cut.
Measurement and Cutting Errors
Measuring once and cutting creates expensive mistakes. Always measure twice and cut once. Mark your cut line clearly on the waste side of the measurement to preserve exact dimensions.
Using dull blades produces rough cuts requiring excessive sanding. Replace saw blades when they stop cutting cleanly through wood. Sharp blades reduce tear-out and create smoother edges for gluing.
Do These Things
Measure from the same edge consistently
Label all pieces after cutting
Test-fit assemblies before gluing
Keep saw blades sharp and clean
Sand with the grain direction
Avoid These Mistakes
Skipping the dry-fit assembly step
Using warped or damaged lumber
Over-tightening clamps causing glue starvation
Applying stain to improperly sanded wood
Mixing different wood species in tops
Assembly Issues
Misaligned pocket holes cause weak joints and visible fasteners. Set your pocket hole jig to match exact material thickness. Drill test holes in scrap pieces to verify settings before drilling actual project pieces.
Insufficient glue creates weak joints that fail under stress. Apply enough glue to see slight squeeze-out when clamping pieces together. Too much glue wastes material but too little compromises joint strength.
Uneven clamping pressure causes joints to misalign during glue curing. Use cauls (straight boards) across glue joints to distribute pressure evenly. Position clamps directly opposite each other on both sides of the assembly.
Finishing Problems
Skipping sanding grits leaves visible scratches under stain and finish coats. Start with 80-grit sandpaper to level surfaces and remove mill marks. Progress through 120-grit and finish with 220-grit for smooth results.
Applying stain to unsanded surfaces creates blotchy, uneven coloring. Wood fibers must be smooth and uniform to absorb stain consistently. Always sand thoroughly before any stain application.
Avoid Costly Mistakes With Professional Guidance
Learn proven techniques from expert woodworkers. Get detailed plans that eliminate guesswork and material waste. Build beautiful tables with confidence.
Surface preparation determines final appearance more than the finishing products themselves. Sand all surfaces smooth before applying any stain or sealer. Unsanded areas show dramatically once stain highlights wood grain patterns.
Staining Your Table
Test stain colors on scrap pieces from your project lumber. Different wood species absorb stain differently. Pine shows more color variation than oak due to varying density in growth rings.
Apply stain with a clean cloth or brush in the direction of wood grain. Work in sections to maintain a wet edge and prevent lap marks. Wipe excess stain after 5-10 minutes for even coloration.
Important: Pre-stain wood conditioner helps softwoods like pine absorb stain more evenly. Apply conditioner 15 minutes before staining for best results.
Allow stain to dry completely according to manufacturer instructions before applying protective topcoats. Rushing this step causes finish problems. Most oil-based stains require 8-12 hours of drying time.
Applying Protective Topcoats
Polyurethane provides durable protection for dining table tops. Water-based polyurethane dries clear without yellowing. Oil-based versions offer slightly better durability with a warm amber tone.
Apply thin coats rather than one thick coat of polyurethane. Thin applications dry faster and level better without runs or sags. Plan for three coats minimum on table tops receiving heavy use.
Sand lightly between coats with 320-grit sandpaper after each coat dries. This step removes dust nibs and creates mechanical bonding for subsequent coats. Wipe sanding dust with a tack cloth before the next coat application.
Alternative Finishing Options
Danish oil penetrates wood fibers rather than building surface film. This finish enhances natural wood beauty while providing modest protection. Apply multiple coats, allowing each to penetrate for 15 minutes before wiping excess.
Paste wax over sealed wood creates a silky smooth feel. Buff wax to a soft sheen with clean cloths. Reapply wax every few months to maintain protection and luster on your diy dining table.
Different Table Styles You Can Build
Farmhouse tables feature chunky legs and simple apron construction. This rustic style suits beginners with basic tools. The straightforward design uses pocket hole joinery throughout for fast assembly.
Modern Minimalist Designs
Modern tables emphasize clean lines and simple geometry. Straight tapered legs replace traditional turned profiles. The minimalist aesthetic requires precise cuts and careful sanding for flawless surfaces.
Waterfall edge designs extend the table top vertically down each end. This contemporary detail creates visual interest without complex joinery. Miter the corner joint where horizontal top meets vertical edge.
Farmhouse Style Features
Thick turned or square legs
Visible wood grain and knots
Distressed or painted finishes
Simple apron construction
Rustic hardware accents
Modern Style Elements
Sleek tapered or hairpin legs
Smooth uniform grain patterns
Natural or dark stain finishes
Minimal visible joinery
Geometric shapes and angles
Traditional and Formal Tables
Traditional dining tables incorporate decorative elements and refined proportions. Turned legs feature detailed profiles created on a wood lathe. Carved details on aprons add elegance to formal designs.
Breadboard ends finish table tops with cross-grain boards at each end. This traditional detail conceals end grain while allowing seasonal wood movement. The technique requires mortise and tenon joinery for proper installation.
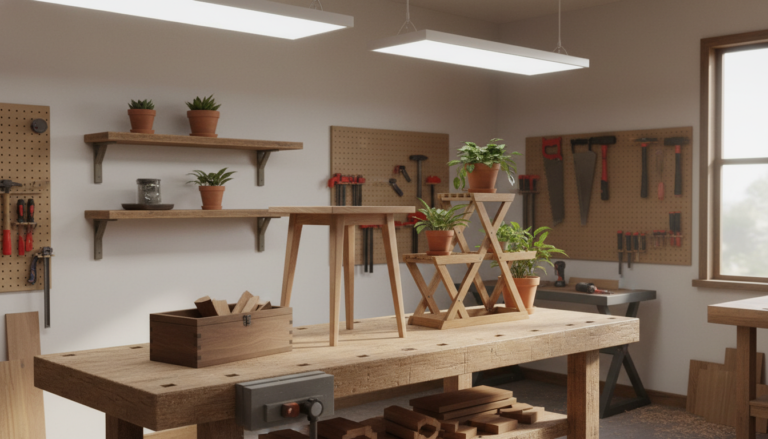
Coffee and Side Table Projects
Smaller accent tables provide excellent first projects for learning skills. Coffee tables typically stand 16-18 inches tall with top dimensions around 48×24 inches. These proportions suit most living room seating arrangements.
Side tables require less lumber and shorter building time than dining table projects. Standard height measures 24-26 inches to match sofa arm height. Top size varies from 16×16 inches to 24×24 inches depending on available space.
Calculating Materials and Cutting Lists
Accurate material calculations prevent mid-project trips to the lumber yard. List every piece required for your table project including exact dimensions. Add 10-15% extra for cutting waste and potential mistakes.
Standard Dining Table Dimensions
Dining tables accommodate different numbers of people based on size. A 36×60 inch table seats 4-6 people comfortably. Expand to 42×72 inches for seating 6-8 guests with adequate elbow room.
Height standardizes at 29-30 inches from floor to table top surface. This measurement pairs with standard 18-inch chair seat heights. Maintain consistent leg length to achieve proper finished table height.
Table Size
Seating Capacity
Room Size Needed
Leg Height
36″ x 60″
4-6 people
10′ x 12′
28.5″
42″ x 72″
6-8 people
11′ x 14′
28.5″
48″ x 96″
8-10 people
12′ x 16′
28.5″
Lumber Quantities for Different Sizes
A standard 72-inch dining table top requires approximately 5-6 boards of 1x6x8 lumber. This estimate assumes edge-gluing boards to reach 36-inch width. Calculate your specific needs based on actual board widths after jointing edges.
Table base construction typically uses 2×4 lumber for aprons and stretchers. A complete base for a 72-inch table needs approximately 20-24 linear feet. Purchase in 8-foot lengths to minimize waste from multiple cuts.
Money-Saving Tip: Buy lumber in longer lengths when possible. A single 10-foot board costs less than two 6-foot pieces and reduces waste from unusable short offcuts.
Hardware and Supplies Checklist
Pocket hole screws quantity depends on joint count throughout your project. Estimate 4-6 pocket hole screws per joint for adequate strength. A typical dining table uses 60-80 pocket hole screws in various lengths.
Fasteners Needed
1.25″ pocket hole screws (40-50)
2.5″ pocket hole screws (20-30)
1.25″ wood screws (12-16)
Corner brackets (4-8)
Adhesives & Fillers
Wood glue (16 oz bottle)
Wood filler matching stain
Sandpaper assorted grits
Tack cloths (3-4)
Finishing Materials
Wood stain (1 quart)
Polyurethane (1 quart)
Foam brushes (6-8)
Lint-free rags
Wood glue requirements vary with project size and joint count. One 16-ounce bottle suffices for most standard dining table projects. Purchase an extra bottle if building multiple tables or very large pieces.
Time and Skill Requirements
Building your first diy dining table typically requires 15-20 hours spread across several days. This timeline includes cutting, assembly, sanding, and finishing with drying time between coats. Experience reduces this time significantly on subsequent projects.
Breaking Down the Building Process
Cutting all pieces to size takes 2-3 hours for beginners carefully measuring each piece. Drilling all pocket holes adds another 1-2 hours depending on joint complexity. These preparation steps determine final quality significantly.
Base assembly requires 2-3 hours including dry-fitting and final glue-up. Allow glue to cure overnight before proceeding. Table top glue-up takes 1-2 hours plus overnight curing time before sanding begins.
Beginner Timeline
Planning and layout: 2 hours
Cutting pieces: 3 hours
Base assembly: 3 hours
Top construction: 3 hours
Sanding: 2 hours
Finishing: 6 hours total
Experienced Timeline
Planning and layout: 1 hour
Cutting pieces: 1.5 hours
Base assembly: 1.5 hours
Top construction: 2 hours
Sanding: 1 hour
Finishing: 4 hours total
Required Skill Level Assessment
Basic table construction suits confident beginners comfortable with power tools. You need ability to make accurate measurements and straight cuts. Experience with a drill and circular saw provides adequate foundation for starting simple projects.
Pocket hole joinery simplifies construction significantly compared to traditional methods. The technique eliminates complex chisel work and precise mortise cutting. A pocket hole jig guides the drill bit at correct angles automatically.
Advanced table designs requiring decorative elements need intermediate woodworking skills. Turned legs demand lathe operation experience. Carved details require specialized chisels and carving techniques developed through practice.
Maintaining Your Handmade Table
Proper maintenance preserves your table’s beauty for generations. Wipe spills immediately to prevent moisture damage and staining. Use coasters under all glasses and hot pads under serving dishes.
Daily and Weekly Care
Dust your table daily with a soft dry cloth to prevent abrasive buildup. Weekly cleaning with slightly damp cloth removes light soil and fingerprints. Dry immediately after damp cleaning to prevent water spots.
Avoid harsh chemical cleaners that strip protective finishes over time. Simple dish soap diluted in water cleans most dining table messes safely. Test any new cleaning product on an inconspicuous area first.
Periodic Maintenance Tasks
Inspect leg joints every 6 months for looseness from regular use. Tighten any loose wood screws or pocket hole screws immediately. Apply fresh wood glue to opened joints before retightening for maximum hold.
Reapply paste wax every 3-4 months on waxed finishes. Buff to restore luster and protection. Polyurethane finishes need recoating every 3-5 years depending on wear patterns and use intensity.
Preventing Common Damage
Direct sunlight fades wood stain and finish over time. Position tables away from windows or use window treatments during peak sun hours. Rotate decorative items regularly to prevent uneven fading patterns.
Extreme humidity changes cause wood movement and potential cracking. Maintain consistent indoor humidity between 35-55% year-round. Use humidifiers in winter and dehumidifiers in summer as needed for stability.
Taking Your Woodworking to the Next Level
Success with your first table project builds confidence for more ambitious furniture. Each project teaches new techniques and problem-solving skills. Progress naturally from simple designs to complex constructions as abilities develop.
Comprehensive diy table plans accelerate your learning curve significantly. Professional plans include detailed diagrams, cut lists, and assembly sequences. These resources eliminate guesswork and prevent expensive material mistakes common with vague instructions.
Expanding Your Tool Collection
A quality table saw transforms your capabilities for future projects. This investment delivers accurate repeatable cuts impossible with circular saws. The table saw handles both rip cuts along grain and crosscuts across boards efficiently.
A thickness planer creates uniform board thickness from rough lumber. This tool saves money by allowing purchase of cheaper rough-sawn wood. Plane boards to exact specifications for consistent results throughout projects.
Jointers create perfectly flat surfaces and square edges for gluing boards edge-to-edge. This specialized tool eliminates gaps in table top glue-ups. The jointer partners with your thickness planer for complete lumber preparation capability.
Advanced clamps in various sizes improve assembly quality across all projects. Parallel jaw clamps maintain even pressure without twisting joints. Specialty clamps like corner clamps simplify base assembly significantly.
Learning Advanced Techniques
Mortise and tenon joinery creates heirloom-quality furniture built to last generations. This traditional method requires practice but delivers unmatched strength and beauty. Master this technique for formal dining table projects and fine furniture.
Dovetail joints showcase woodworking skill in drawer construction and decorative applications. Hand-cut dovetails demonstrate craftsmanship while providing mechanical strength. Practice on scrap wood before incorporating into finished projects.
Master Professional Table Building Today
Stop struggling with incomplete plans and confusing instructions. Get instant access to comprehensive woodworking plans designed for real results. Build beautiful, sturdy tables with professional techniques and detailed guidance every step of the way.
Curved components add visual interest to modern and contemporary designs. Steam bending creates graceful curves in solid wood. Lamination techniques glue thin strips around forms for permanent curved shapes in table legs or aprons.
Building a Complete Furniture Collection
Tables serve as foundation pieces for developing complete furniture sets. Matching coffee tables, end tables, and console tables create cohesive room designs. Consistent joinery methods and finishing techniques unify separate pieces visually.
Expand your skills to chair construction after mastering table techniques. Chairs require similar joinery but add complexity with angled joints and curved backs. Build matching chairs to complement your handmade dining table for complete custom dining sets.
Start Building Your Dream Table Today
Building custom tables transforms your living space while developing valuable woodworking skills. The satisfaction of creating functional furniture with your own hands exceeds any store-bought alternative. Every project improves your techniques and expands your capabilities.
Success depends on proper planning, quality materials, and clear instructions. Comprehensive diy table plans provide the roadmap for achieving professional results. Detailed cut lists prevent material waste while step-by-step diagrams eliminate confusion during assembly.
The techniques covered in this guide apply to countless table styles and sizes. Pocket hole joinery simplifies construction without compromising strength. Proper finishing techniques protect your investment while showcasing natural wood beauty.
Your first table project marks the beginning of a rewarding woodworking journey. Each completed piece builds confidence for more ambitious furniture projects. Invest in comprehensive plans that guide you through every step with professional expertise and proven methods.
Start your table building project with the right foundation of knowledge and detailed plans. Access expert guidance that eliminates guesswork and prevents costly mistakes. Transform raw lumber into beautiful custom furniture that serves your family for generations.
Finding the perfect gift for your best friend isn’t just about checking a box on your to-do list—it’s about celebrating that one-of-a-kind connection you share. Whether you’ve been friends since kindergarten or met more recently, the right gift can speak volumes about how much you value having them in your life. From sentimental keepsakes that…
Moving into a new home marks a significant milestone in anyone’s life. Whether it’s a first apartment, dream house, or cozy condo, this transition deserves celebration. A thoughtfully curated housewarming gift basket offers the perfect way to welcome friends, family, or neighbors to their new space with items that feel both personal and practical.This Website…
Losing weight quickly feels like an impossible challenge. You have tried countless diet plans and exercise routines. Yet the scale refuses to budge in the direction you want.This Website contains affiliate links. That means I may earn a small commission if you purchase through my links, at no extra cost to you. Many people share…
Valentine’s Day has a way of sneaking up on us. One minute you’re recovering from the holiday season, and the next you’re frantically searching for the perfect gift to express your love. But don’t worry! Last minute valentines gifts don’t have to feel rushed or thoughtless. We’ve curated 15 amazing gift ideas that not only…
Bad breath can destroy your confidence. You might avoid close conversations. Maybe you constantly chew gum or use mints. Perhaps you brush your teeth multiple times daily. Yet the problem persists.This Website contains affiliate links. That means I may earn a small commission if you purchase through my links, at no extra cost to you….
Starting your woodworking journey doesn’t require years of experience or expensive power tools. Whether you want to refresh your living room or create functional pieces for your house, simple projects offer the perfect way to build skills and confidence.This Website contains affiliate links. That means I may earn a small commission if you purchase through…