Quick DIY Wood Crafts: Transform Scrap Wood Into Stunning Creations
Wood crafts bring warmth and character to any space. The beauty of working with wood lies in its versatility and accessibility. Whether you have leftover boards from previous projects or picked up some inexpensive lumber, you can create functional and decorative pieces in just a few hours.
This Website contains affiliate links. That means I may earn a small commission if you purchase through my links, at no extra cost to you.
Many people hesitate to start woodworking because they think it requires expensive equipment or years of experience. That’s simply not true. With basic tools and simple techniques, anyone can craft beautiful wooden items for their home or as thoughtful gifts.
This guide shares practical project ideas that won’t overwhelm beginners. Each craft uses minimal materials and straightforward construction methods. You’ll discover how scrap wood pieces can become useful household items that friends and family will admire.
Why Quick DIY Wood Crafts Are Perfect for Everyone
Wood projects offer something special that other DIY activities can’t match. The natural texture and grain patterns make each piece unique. Even simple designs gain visual interest from the wood itself.
Cost-Effective Creative Outlet
Working with scrap wood keeps costs incredibly low. Many projects require just one or two boards that cost a few dollars at your local hardware store. Some crafters find free wood from construction sites, pallets, or furniture being discarded.
Tools don’t need to break the bank either. A basic saw, drill, and sandpaper can handle most beginner projects. As your skills grow, you can gradually add specialized equipment to your workshop space.

Sustainable and Eco-Friendly
Repurposing wood scraps reduces waste heading to landfills. Old furniture pieces, shipping pallets, and construction leftovers can become beautiful new items. This sustainable approach benefits the environment while creating one-of-a-kind pieces.
Natural wood requires no synthetic materials or harmful chemicals. Finishing with simple oils or waxes keeps projects safe for kitchen use and children’s rooms. The materials decompose naturally at the end of their useful life.

Therapeutic and Rewarding
Woodworking engages both mind and hands in focused activity. The repetitive motions of sanding or sawing create a meditative state that reduces stress. Many crafters report feeling calmer after time in their workshop.
Completing a project provides genuine satisfaction. Holding something you built with your own hands creates pride that buying finished items never can. Giving handmade gifts shows recipients you invested time and care.
Quick Tip: Start with one small project rather than collecting supplies for multiple ideas. Finishing your first piece builds confidence and momentum for the next one.
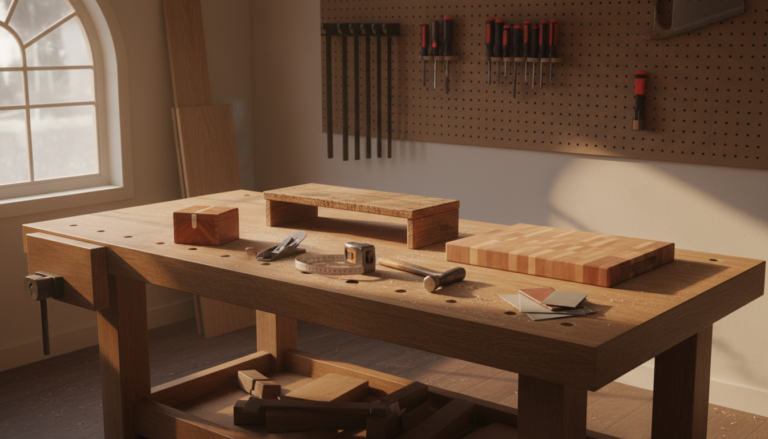
Essential Tools and Materials for Quick Wood Projects
You don’t need a fully equipped workshop to start creating. Most beginner wood crafts require just a handful of basic tools. Building your collection gradually makes more sense than purchasing everything at once.
Must-Have Tools for Beginners
Cutting Tools
- Hand saw or circular saw for straight cuts
- Miter saw for angled pieces (optional but helpful)
- Jigsaw for curved designs
- Sharp utility knife for detail work
Fastening Tools
- Cordless drill with basic bit set
- Hammer for nails and adjustments
- Screwdriver set (flathead and Phillips)
- Wood glue for strong joints
Finishing Tools
- Sandpaper in various grits (80, 120, 220)
- Sanding block or electric sander
- Paintbrushes for stain or finish
- Clean rags for wiping and applying oils

Wood Selection Guide
Different wood types suit different projects. Softwoods like pine cost less and work easily for practice pieces. Hardwoods such as oak or maple offer durability for items that receive heavy use.
- Pine boards – inexpensive, easy to cut, good for painted projects
- Cedar pieces – naturally weather-resistant for outdoor items
- Plywood sheets – stable and affordable for larger surfaces
- Hardwood scraps – beautiful grain for small decorative pieces
- Pallet wood – free material with rustic character
Beginner’s Tip: Start with pine or poplar for your first projects. These softer woods forgive mistakes better than expensive hardwoods. You can practice techniques without worrying about wasting costly materials.
Safety Equipment You Can’t Skip
Protecting yourself matters more than any project. Simple safety gear prevents injuries that could sideline your woodworking hobby. These items cost little compared to a trip to the emergency room.
Safety First: Always wear safety glasses when cutting or sanding wood. Wood chips moving at high speed can cause serious eye damage. Keep a first aid kit in your work area for minor scrapes.
- Safety glasses or goggles to protect eyes from flying debris
- Dust mask or respirator when sanding produces fine particles
- Hearing protection for power tool use
- Work gloves for handling rough lumber
- Closed-toe shoes to protect feet from dropped tools or wood

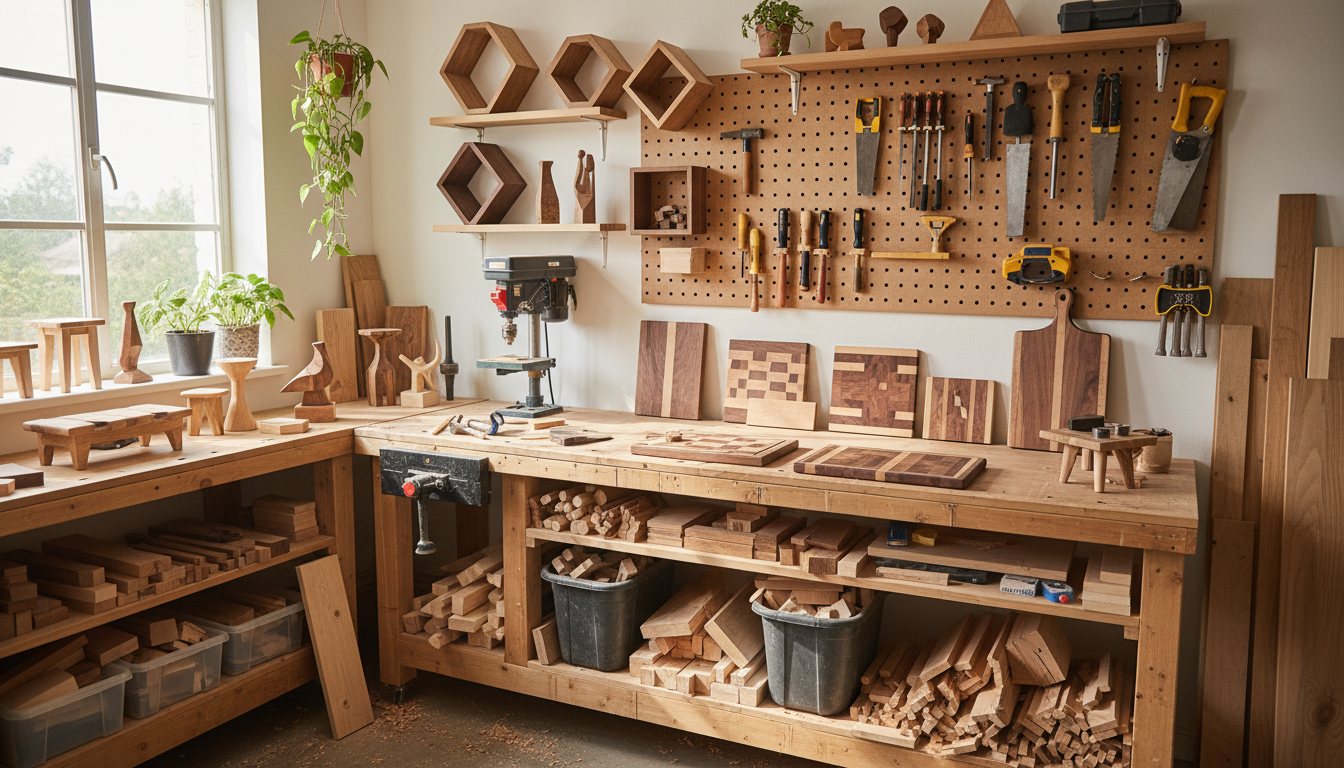
Kitchen and Dining Wood Craft Projects
The kitchen offers endless opportunities for functional wood items. These projects combine practicality with aesthetic appeal. Friends always appreciate handmade pieces that make cooking and serving more enjoyable.
Cutting Board From Scrap Hardwood
A custom cutting board makes an excellent first project. Select hardwood pieces that can withstand knife cuts and frequent washing. Maple, walnut, or cherry create beautiful surfaces that develop character over time.
Cut boards to equal width and desired length. Apply wood glue to edges and clamp pieces together tightly. After the glue dries completely, sand the surface smooth starting with coarse grit and progressing to fine. Round the edges slightly for comfort.
Finish with food-safe mineral oil to protect the wood and enhance grain patterns. This simple design takes just a couple hours but produces a kitchen essential people use daily.

Utensil Holder for Counter Organization
Kitchen counters accumulate clutter quickly. A wooden utensil holder keeps cooking tools organized and within reach. This project requires minimal wood and can be completed in under an hour.
Cut a piece of wood to serve as the base. Drill several holes partway through using a spade bit sized for your utensils. Sand all surfaces smooth and apply a water-resistant finish. The holder can remain natural or be painted to match your kitchen decor.

Serving Tray With Handles
Serving trays bring breakfast in bed or drinks to the patio. This project uses a flat board as the base with side pieces and handles attached. The design accommodates any size based on available wood.
Cut the base board to your desired tray size. Attach strips along each edge to create raised sides that prevent items from sliding off. Drill holes through two opposite sides for rope handles or cut handle shapes from solid wood pieces.
Sand everything thoroughly, paying special attention to handle edges that people will grip. Stain or paint the tray to match your style. A clear protective coat makes cleanup easier after spills.

Spice Rack for Wall Storage
Spices scattered in cabinets waste space and time. A wall-mounted spice rack brings order to any kitchen while adding decorative elements. The simple shelf design holds standard spice jars securely.
Build small shelves from thin boards with a lip along the front edge. Mount them to a backing board at even intervals. The front lip prevents jars from falling when you remove others. This vertical storage solution works even in small kitchens with limited counter space.

Living Room and Decorative Wood Projects
Living spaces benefit from personal touches that reflect your style. Wood accents add warmth and texture to modern or traditional rooms. These projects focus on decorative elements that make a room feel complete.
Floating Shelf for Display Space

Floating shelves appear to hover without visible brackets. This illusion comes from mounting hardware hidden inside the shelf itself. The clean lines suit any decor style while providing display space for photos, plants, or collections.
Cut a board to your desired shelf length. Drill holes in the back to fit over wall-mounted brackets. Sand and finish the wood before installation. The simple design lets displayed items take center stage.
Picture Frame From Reclaimed Wood
Reclaimed wood brings character that new lumber can’t match. Old fence boards or barn wood have weathered textures and color variations that make unique frames. These one-of-a-kind pieces showcase your favorite photos perfectly.
Cut four pieces to frame your photo size, mitering corners at 45-degree angles. Join corners with glue and small nails. Add a backing board and hardware for hanging. The rustic frame contrasts beautifully with modern printed photos.

Wall Art From Wood Pieces
Abstract wall art from wood scraps creates focal points in any room. Arrange pieces of varying sizes and tones into geometric patterns. This project lets you use up small leftover pieces while creating custom art.
Plan your design on paper first to determine piece sizes needed. Cut wood into squares, rectangles, or hexagons. Sand each piece and apply different stain colors to create contrast. Attach pieces to a backing board in your planned pattern.

Plant Stand for Indoor Greenery
Plants improve air quality and add life to living spaces. A wooden plant stand elevates pots to eye level where they receive better light and become part of the room design. This simple structure uses just a few boards.
Build a basic frame using four legs and cross supports. Add a top platform sized for your plant pot. The stand can be tall for floor placement or short for table use. Natural wood finish complements green foliage beautifully.

Coat Hooks for Entryway Organization
Entryways quickly become cluttered without proper storage. Wall-mounted coat hooks provide a designated spot for jackets, bags, and hats. A board with attached hooks takes minimal time to create but dramatically improves organization.
Cut a board the desired length for your wall space. Sand it smooth and apply your chosen finish. Attach decorative hooks at regular intervals using strong screws. Mount the entire board to wall studs for secure installation that handles heavy winter coats.
This functional piece can remain simple or become decorative with carved details or painted designs. The hooks keep outerwear off furniture and floors where it creates mess.

Storage and Organization Wood Crafts
Every home needs better storage solutions. Wood projects can organize everything from tools to toiletries. These functional builds solve real problems while looking attractive enough to display openly.
Desktop Organizer for Office Supplies
Desks collect pens, paper clips, and sticky notes that create visual chaos. A wooden desktop organizer corrals these items into designated compartments. The compact design fits on any desk size.
Create a box with dividers inside to separate different supply types. Small compartments hold paper clips and thumbtacks. Taller sections accommodate pens and markers standing upright. A slot along the back can organize mail or notebooks vertically.
This project uses scrap plywood or thin boards. Simple butt joints connected with glue and small nails work perfectly. Sand all edges smooth so nothing snags papers or scratches the desk surface.

Key Holder With Mail Slot
Lost keys and misplaced mail cause daily frustration. A combination key holder and mail slot by the door solves both problems. This wall-mounted piece becomes the landing spot for items as you enter.
Build a shallow box with an open top to hold envelopes and magazines. Attach hooks along the bottom edge for keys. Mount the unit near your entry door at a convenient height. You’ll never search for keys or important letters again.

Bathroom Shelf With Towel Bar
Bathrooms never have enough storage for toiletries and towels. A combination shelf and towel bar maximizes vertical wall space. The design works in even the smallest powder rooms.
Create a simple shelf with a wooden dowel or metal bar attached underneath. The shelf holds shampoo bottles or decorative items. The bar provides a place for hand towels within easy reach of the sink.

Magazine Rack for Living Room
Magazines and newspapers pile up on coffee tables and floor space. A dedicated magazine rack keeps reading material organized and accessible. This angled design lets you see all the titles at once.
Cut side pieces with a slanted profile. Add horizontal dividers at an angle to create slots that display magazine covers. The rack can stand on the floor beside a chair or mount to a wall. Wood grain and simple construction create an attractive storage piece.

Tool Storage Box
Workshop tools scattered on benches waste time and risk damage. A wooden tool box keeps everything organized and portable. The divided interior separates different tool types for quick access.
Build a rectangular box with a handle across the top for carrying. Add a divider down the center and smaller compartments for hardware. The portable design lets you bring tools to the project rather than carrying materials to the workshop.

Ready to Take Your Woodworking Skills to the Next Level?
These quick projects are just the beginning of what you can create with wood. If you’re serious about developing your woodworking abilities and tackling more advanced designs, there’s a comprehensive system that can guide you step by step.
Discover professional techniques, detailed plans, and expert guidance that will transform you from a beginner into a confident woodworker. Learn the methods that experienced crafters use to create stunning furniture and home decor pieces.
Gift Ideas and Special Occasion Wood Projects
Handmade gifts show thoughtfulness that purchased items can’t convey. Wood crafts make memorable presents for holidays, weddings, and housewarmings. These projects suit various skill levels and recipient interests.
Personalized Name Sign

Name signs personalize a child’s room or mark a family home. Cut letters from thin plywood or rout them into a solid board. The customization makes each sign unique to the recipient.
Trace letter shapes onto wood and carefully cut them out. Sand edges smooth to prevent splinters. Paint letters in favorite colors or leave natural wood tones. Attach letters to a backing board or string them together with twine for hanging.
Wine Bottle Holder Stand
Wine enthusiasts appreciate creative bottle displays. A wooden holder showcases their collection while keeping bottles at the proper angle. This conversation piece combines function with visual interest.
Design a base that balances the weight of a wine bottle at an angle. Cut the support structure and sand all surfaces. The holder can be simple and modern or ornate with carved details depending on your skill level and the recipient’s taste.

Phone Stand for Desk or Nightstand
Everyone needs a convenient spot for their phone while working or sleeping. A wooden phone stand props the device at a perfect viewing angle for video calls or bedside use. The compact size fits anywhere.
Cut a base piece and an angled support that holds the phone upright. A groove along the base edge keeps the phone from sliding. The simple design requires just two pieces of wood and minimal cutting.
Sand all surfaces extra smooth since hands touch this item frequently. A clear finish protects the wood from natural oils on fingers. This practical gift suits anyone who owns a smartphone.

Jewelry Box With Compartments
A handcrafted jewelry box becomes a treasured keepsake. The compartmented interior organizes rings, earrings, and necklaces separately. This intermediate project requires careful measurement but creates a truly special gift.
Build a box with a hinged lid and felt-lined interior. Add dividers to create sections for different jewelry types. Small dowels can hold necklaces to prevent tangling. The finished piece protects precious items while displaying your craftsmanship.

Kids and Family Wood Craft Projects
Projects for children combine fun with functionality. These builds create toys and room accessories kids will use for years. Involving children in simple construction teaches valuable skills while creating memories.
Toy Storage Box With Lid
Toy clutter overwhelms family rooms and playrooms. A sturdy wooden toy box provides storage that children can access independently. The simple box construction works for beginners while producing a practical piece.
Build a rectangular box sized for the space available. Add a hinged lid with safety supports that prevent slamming on small fingers. Sand all edges and corners extra thoroughly for child safety. Paint with bright colors or let kids decorate their own storage box.

Step Stool for Kitchen or Bathroom
Young children need help reaching sinks and counters. A solid wooden step stool provides safe elevation for daily tasks. This build requires strong joints to support a child’s weight safely.
Construct a sturdy frame with wide steps and a broad base for stability. Round all corners and edges to prevent injuries. The stool should be heavy enough not to tip but light enough for a child to move. A clear finish shows natural wood while protecting against moisture in bathrooms.

Wooden Board Game Set
Classic board games on wood create family game night traditions. Tic-tac-toe, checkers, or simple peg games provide screen-free entertainment. The handmade board becomes an heirloom passed down through generations.
Sand a board perfectly smooth for the playing surface. Mark game lines with wood burning tools or paint. Create playing pieces from small wooden discs or carved shapes. Store everything in a matching wooden box to keep pieces together.

Bookshelf for Kid’s Room
Encouraging reading starts with accessible book storage. A low bookshelf lets children browse and select books independently. The simple shelf design can be built in an afternoon.
Create several shelves at heights a child can reach. Space them to accommodate various book sizes from board books to chapter books. Paint or stain to match room decor. This project grows with the child as their book collection expands.

Tips for Success With Quick Wood Crafts
Even simple projects benefit from proper techniques and planning. These tips help beginners avoid common frustrations and achieve professional-looking results. Small improvements in your approach make a significant difference in the finished piece.
Measure Twice, Cut Once
The old carpenter’s saying exists for good reason. Double-checking measurements prevents wasted materials and frustrating mistakes. Take your time with this step even when eager to start building.
- Use a quality measuring tape that stays rigid when extended
- Mark cut lines clearly with a sharp pencil for visibility
- Verify all measurements before making any cuts
- Account for blade thickness when cutting multiple pieces
- Keep a scrap piece nearby for test cuts on new techniques

Sand More Than You Think Necessary
Rough surfaces ruin otherwise beautiful projects. Adequate sanding makes the difference between amateur and professional appearance. The extra time invested in this step shows in the final result.
Start with coarser grit sandpaper to remove saw marks and major imperfections. Progress through medium grits to smooth the surface. Finish with fine grit for a silky feel. Always sand with the wood grain direction to avoid visible scratches.
Pro Tip: Run your hand over sanded surfaces to feel for rough spots your eyes might miss. Any snag you feel will be more noticeable after applying finish.
Choose the Right Wood for Each Project
Different woods suit different applications. Hardwoods withstand wear better for cutting boards and furniture. Softwoods work well for decorative pieces and painted projects where grain visibility doesn’t matter.
Consider moisture exposure when selecting wood. Cedar and teak naturally resist rot for outdoor projects. Regular pine needs proper sealing for bathroom or kitchen use where water exposure occurs.

Invest in Quality Fasteners
Cheap screws and nails cause frustration and weak joints. Quality fasteners drive smoothly without splitting wood. They hold securely for years of use. The small cost difference pays off in easier construction and better results.
- Use coated screws for outdoor projects to prevent rust stains
- Pre-drill holes for screws near board ends to prevent splitting
- Match fastener length to project needs without excessive protrusion
- Keep various sizes on hand for different applications
Work in a Well-Lit Space
Poor lighting causes measurement errors and safety hazards. Bright, even illumination helps you see cut lines clearly and notice defects before they become problems. Good lighting reduces eye strain during detail work.

Finish and Protect Your Work
Unfinished wood absorbs moisture, collects dirt, and degrades faster. Proper finishing protects your investment of time and materials. The right finish enhances wood grain while providing practical protection.
For kitchen items, use food-safe mineral oil or beeswax that won’t contaminate food. Furniture pieces benefit from polyurethane or varnish that resists scratches and moisture. Outdoor projects need exterior-grade finishes with UV protection.
Apply thin coats rather than one thick application. Multiple light coats dry faster and produce smoother results. Sand lightly between coats with very fine sandpaper for professional-quality finishes.

Common Mistakes to Avoid When Starting Wood Crafts
Everyone makes mistakes when learning new skills. Knowing the most common errors helps you avoid them or fix them quickly. These lessons learned from experienced crafters save time and materials.
Skipping the Planning Stage
Enthusiasm to start building tempts people to skip planning. This approach leads to parts that don’t fit, wasted materials, and abandoned projects. Spending time on planning prevents these frustrations.
Avoid This: Don’t start cutting without a clear plan and cut list. Sketch your project with dimensions before purchasing materials. This simple step prevents costly mistakes.
Draw your project from multiple angles to understand how pieces connect. Create a materials list with exact dimensions and quantities needed. Account for mistakes by purchasing slightly more wood than calculations show.

Using Dull Cutting Tools
Dull blades require excessive force that causes dangerous slips and poor cuts. Sharp tools cut cleanly with less effort and produce better results. Regular maintenance keeps your tools performing properly.
Replace saw blades when cutting becomes difficult or burn marks appear on wood. Sharpen drill bits that require pressure to penetrate. Clean tools after each use to prevent pitch buildup that affects performance.
Ignoring Wood Movement
Wood expands and contracts with humidity changes throughout the year. Designs that don’t account for this movement will crack or warp over time. Understanding wood’s nature prevents structural failures.
Allow gaps in paneled designs for seasonal expansion. Don’t glue large solid panels rigidly into frames. Use fastening methods that permit slight movement while holding pieces securely.
Wood Wisdom: Hardwoods move more than softwoods. Quarter-sawn boards move less than flat-sawn. Store wood in your shop for a week before using so it adjusts to the humidity where you’ll build.
Inadequate Clamping During Gluing
Wood glue creates incredibly strong bonds when used properly. However, joints need pressure during drying for maximum strength. Insufficient clamping results in weak connections that fail under stress.

- Use enough clamps to apply even pressure across entire joint
- Protect wood surfaces with scrap blocks under clamp jaws
- Wipe away excess glue squeeze-out while still wet
- Allow full drying time before removing clamps or stressing joints
Rushing the Finishing Process
After hours of careful construction, rushing the finish ruins projects at the final step. Proper finishing requires patience for drying between coats. The smooth, protected surface justifies the extra time invested.
Read finish product labels for recommended drying times and application methods. Work in a dust-free environment so particles don’t settle on wet finish. Apply thin coats that dry properly rather than thick applications that remain tacky.

Transform Your Woodworking Skills Today
You’ve discovered how quick DIY wood crafts can transform scrap wood into beautiful, functional items for your home. These beginner projects are just the foundation of what’s possible when you master proper techniques and gain confidence with tools.
Imagine creating stunning furniture pieces, intricate decorative items, and professional-quality builds that friends and family admire. That level of skill comes from comprehensive guidance that takes you beyond basic projects into advanced woodworking techniques.
What You’ll Gain:
- Step-by-step plans for hundreds of projects at all skill levels
- Professional techniques used by master craftspeople
- Detailed video demonstrations showing exact methods
- Material lists and cutting diagrams for every project
- Troubleshooting guides for common problems
- Advanced joinery methods for stronger, more beautiful builds
Perfect For:
- Beginners ready to advance beyond simple projects
- Hobbyists wanting to refine their techniques
- Anyone who loves creating with their hands
- People looking to save money by building instead of buying
- Those wanting to start a woodworking side business
- Gift-makers seeking unique, personalized creations
Thousands of people have transformed from uncertain beginners into confident woodworkers using this comprehensive system. They’re now building the furniture and decor items they once thought were beyond their abilities.
Don’t let another year pass wishing you had better woodworking skills. The complete guide provides everything you need to progress from basic cuts to complex builds. Every technique is explained clearly with visual demonstrations that make learning easy.
Special Note: This isn’t just a collection of project plans. It’s a complete education system that teaches the fundamental skills and advanced techniques professional woodworkers use every day. You’ll understand not just how to build specific projects, but why certain methods work and how to apply them to your own designs.
Your next project could be a beautiful piece of furniture, a unique gift that brings tears of joy, or even the start of a profitable hobby business. The only thing standing between you and that reality is the decision to invest in your skills today.
Begin Your Wood Crafting Journey
Quick DIY wood crafts offer an accessible entry into the rewarding world of woodworking. The projects shared here require minimal investment in tools and materials while producing items you’ll use and display proudly. Each completed build increases your confidence and skills for more ambitious future projects.
Start with one simple project that excites you. Gather the necessary materials and tools. Take your time with each step, focusing on learning rather than rushing to finish. The process teaches as much as the completed piece.
Wood crafts connect us to traditional skills while creating modern solutions for our homes. The satisfaction of building something with your own hands never diminishes, whether it’s your first cutting board or your hundredth custom frame.

Every master woodworker started exactly where you are now. They made mistakes, learned from them, and gradually developed skills through practice. Your journey begins with a single project and grows from there.
The scrap wood sitting in your garage or available at your local hardware store holds unlimited potential. With basic tools, simple techniques, and a willingness to learn, you can transform those plain boards into items that enhance your living space and bring joy to others. Begin today with one quick project and discover where your creativity leads.